Moss wall art is a trendy and eco-friendly way to bring a touch of nature into your home without the fuss of traditional plants. This simple guide will walk you through easy steps to create your own stunning moss masterpiece, making your interior feel fresh and inviting. Get ready to unleash your creativity!
Choose The Right Moss For Your Project
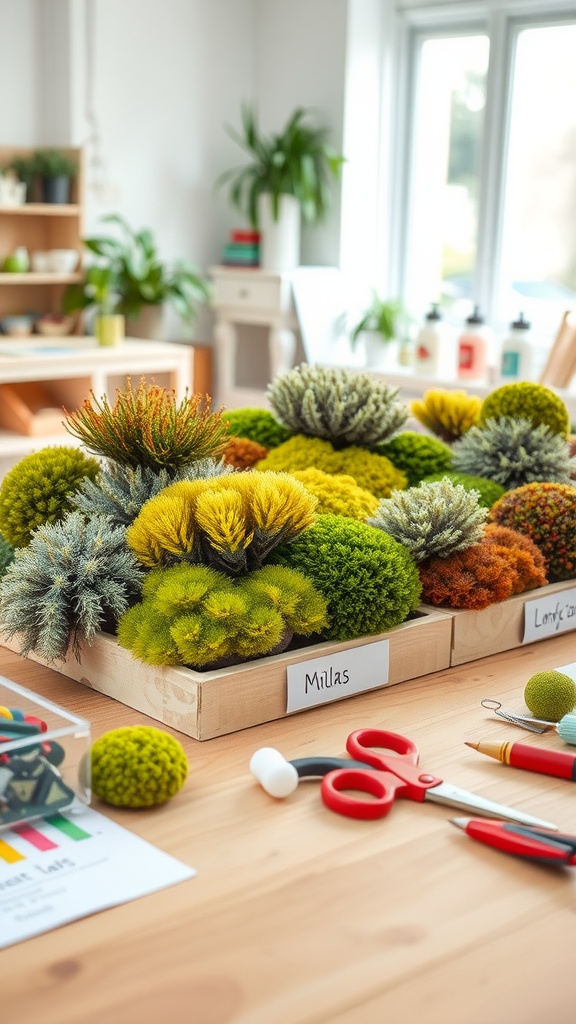
When starting your journey in making a moss wall, it’s essential to select the right type of moss. The image showcases a delightful array of moss options displayed on a wooden table, ready for a creative project. Each variety has its unique texture and color, adding a unique flair to your wall art.
Think about what look you want to achieve. Do you prefer a lush green garden feel or something more colorful? For a DIY living wall, you might choose vibrant mosses that can stand out. If you’re going for a more subdued look, a mix of green and earthy tones works beautifully for a soothing effect.
Real moss wall DIY projects often use live moss, which thrives best in a spot with plenty of indirect sunlight. On the other hand, DIY moss canvas projects can utilize preserved moss, which offers more flexibility in terms of light and care. Knowing how to make indoor moss wall art involves understanding the needs of your chosen moss type.
Another aspect to consider is maintenance. If you’re not keen on regular upkeep, preserved moss is your best bet. It doesn’t require watering or special lighting, making it perfect for hassle-free wall art living moss. Whichever moss you choose, ensure it aligns with your personal style and space.
Pick A Suitable Frame Or Surface For Your Moss Art
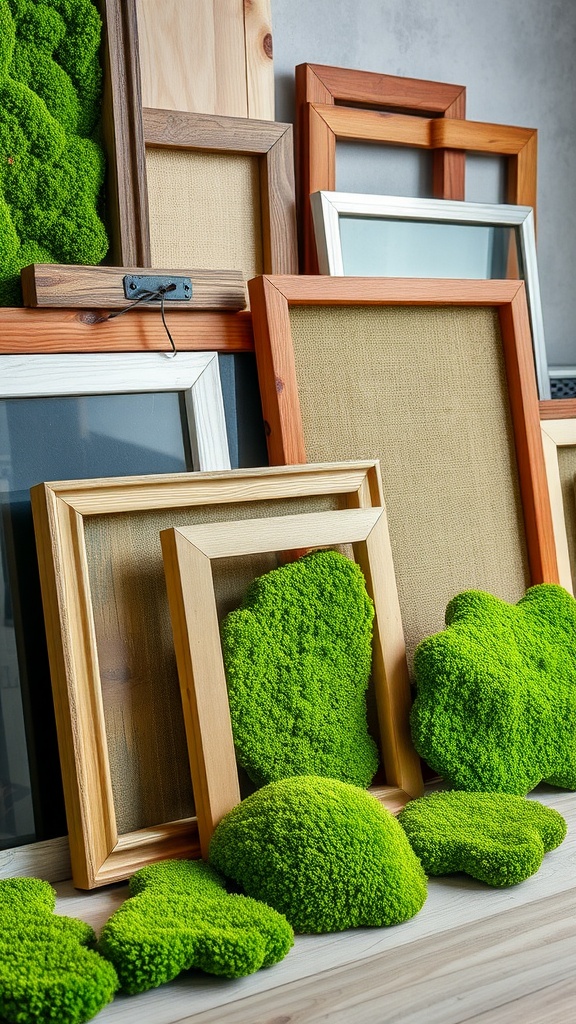
Choosing the right frame or surface is key to making your moss wall art pop. The image shows a variety of frames, from rustic wooden options to sleek modern styles. Each frame gives a different vibe, allowing you to match your decor.
If you’re going for a DIY living wall art look, consider using deep frames. They provide enough depth for the moss, creating a beautiful three-dimensional effect. On the other hand, a flat surface works great for a DIY moss canvas, letting the colors and textures of the moss shine.
Think about how you want your moss art to fit into your space. If you have a minimalist design, a simple frame with a clean line could be perfect. For a more eclectic feel, mix and match different frame styles as shown in the image. This adds personality to your wall art.
When making a real moss wall DIY, remember to choose a surface that can support moisture and is easy to maintain. The right choice will keep your moss looking fresh and vibrant for a long time. With so many options available, you’re sure to find the perfect fit for your project.
Gather Your Materials: Moss, Frame, Glue, And Tools
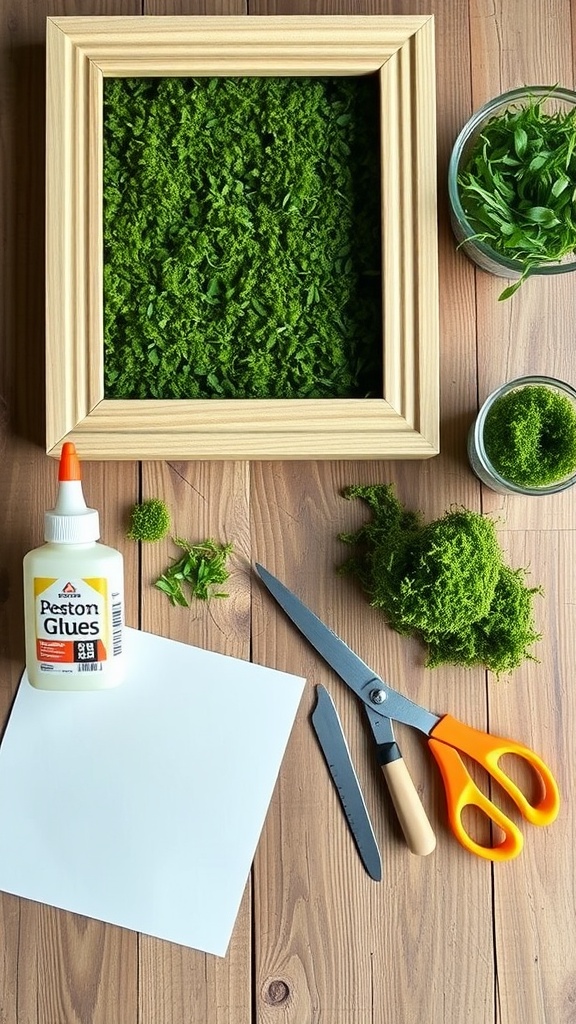
Creating your own moss wall art is a fun and simple project that adds a touch of nature to your home. To get started, gather the right materials. The image shows a beautifully framed piece filled with vibrant green moss, which is the star of your DIY project.
You’ll need a frame to house your moss. Choose one that suits your style, whether it’s rustic or modern. Alongside the frame, make sure you have plenty of moss ready to fill it. This could be preserved moss or real moss, depending on your preference for maintenance.
Next up, grab some glue. A strong adhesive is key to ensure your moss stays in place. You can see a bottle of glue in the picture, which is essential for sticking the moss securely to the backing of your frame.
Don’t forget your tools! A pair of scissors for trimming the moss, a craft knife for precise cuts, and a flat surface to work on are all important. The white sheet visible in the image can be your crafting base.
Lastly, some additional greenery can really enhance your piece. The small bowls in the image show extra bits that you might want to include in your design. With these materials, you’re all set to start making a moss wall that’s truly one of a kind!
Prepare Your Surface By Cleaning And Drying
Getting ready to make your DIY moss canvas starts with a clean workspace. You want a spot that’s free from dust and debris. A smooth surface helps ensure your moss wall art turns out just right.
In the image, we see a wooden table that looks warm and inviting. It’s crucial to wipe it down with a damp cloth to remove any dirt. Let it dry completely afterward. Moist surfaces can affect your moss.
Make sure to have your moss, scissors, and any additional tools nearby. The tools in the picture, like the scissors and wooden stick, are essential for making a living wall. Keeping everything organized sets you up for success.
As you prepare, think about how to make indoor moss wall art that feels fresh and lively. A clean surface will help your project shine. Once everything is ready, the fun of making a moss wall can truly begin!
Create A Design Plan For Your Moss Wall Art
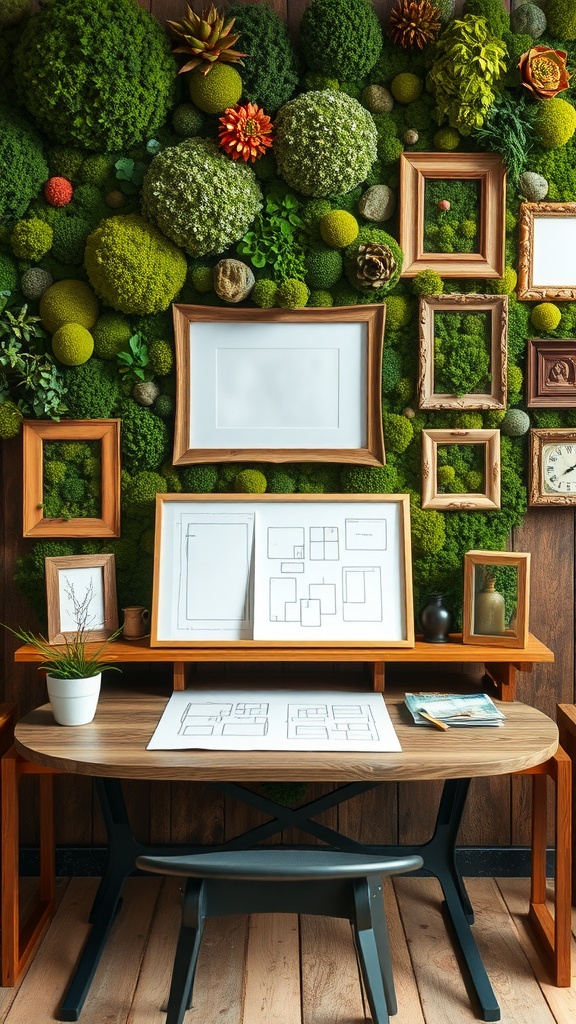
Planning your moss wall art can be a fun and creative process. Start by sketching out your ideas. Look at the vibrant greens and textures in your design. This image shows a beautiful arrangement of moss alongside empty frames and sketches, which can inspire your own layout.
Think about the size and shape of your wall. Do you want a full living wall, or just a section? The design can range from wild and organic to structured and minimalistic. You can even mix different types of moss and plants for a unique look.
Gather your supplies for the DIY project. You will need moss, frames, glue, and a base for your wall art. Check if you want to create a DIY moss canvas or a larger real moss wall. Each option has its charm!
Consider using sketches or mock-ups, like the ones in the image, to visualize your arrangement. This will help you see how to make indoor moss wall art come together. Planning ahead makes the actual making of the moss wall art significantly easier.
Cut And Arrange Moss Pieces To Fit Your Design

Getting hands-on with your Real Moss Wall DIY project is both fun and rewarding. The image shows an array of moss pieces, cut into various shapes and sizes, laid out on a wooden surface. This is the stage where creativity comes into play. Each piece can be arranged to create your unique design.
Start by selecting your moss. Use scissors to cut them into different shapes—squares, triangles, or any design that suits your vision. The versatility of moss allows you to play around with textures and sizes, making it easier to fit them into your wall art DIY project. The key is to have fun and not overthink it!
Once you’ve cut your pieces, take a moment to arrange them before gluing. Lay them out in a way that feels balanced. You might find that certain shapes fit better together. This step is essential in How to Make Live Moss Wall art, as it helps visualize the final product.
Don’t worry if things don’t look perfect at first. Making a moss wall is about expressing your creativity. As you arrange the pieces, you might discover new patterns or combinations you hadn’t considered. Whether you’re making a DIY Moss Canvas or a larger wall piece, each arrangement can offer a fresh take on wall art living moss.
Attach Moss Using Hot Glue Or Floral Adhesive

Attaching moss to your canvas is a fun step in making a moss wall. In the image, you can see hands holding a cluster of vibrant green moss and a bottle of glue, ready to stick it onto the wall. This is a key part of how to make living moss art!
Using hot glue or floral adhesive is effective for securing the moss. Hot glue dries quickly and holds well, making it a popular choice. Just be mindful of the temperature, as it can melt some moss types. Floral adhesive is another option, especially if you want a more flexible bond.
When you’re ready, apply a small amount of glue to the base of the moss piece. Press it firmly onto your canvas or chosen surface. Make sure to give it a bit of time to set. This technique is part of creating a real moss wall DIY that brings a touch of nature indoors.
Different types of moss can create various textures, so feel free to mix them up! This step is crucial in making your wall art DIY unique and personal. Remember, the goal is to have fun and express your creativity while making a stunning living wall art DIY!
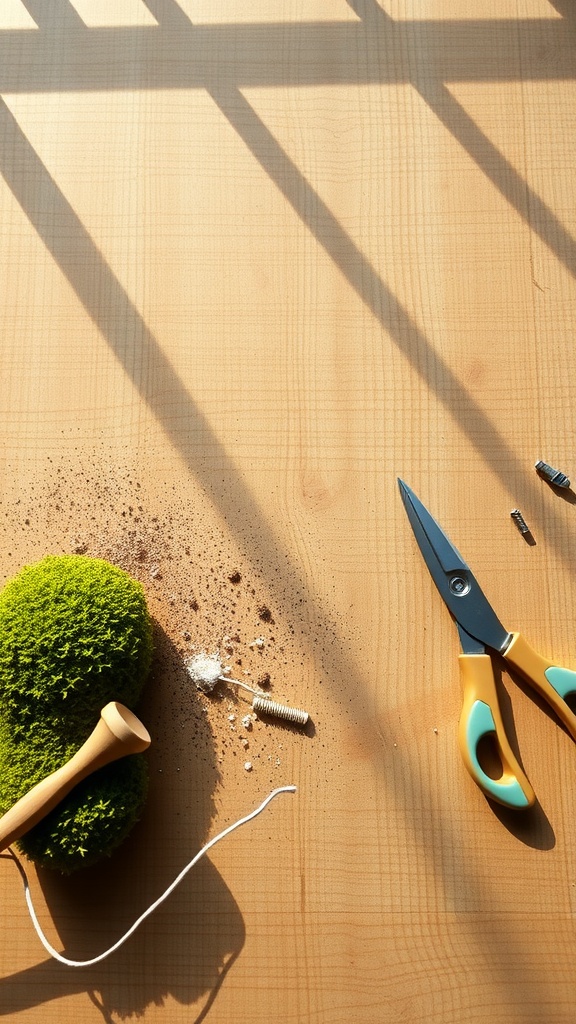
Press Down To Secure The Moss Firmly
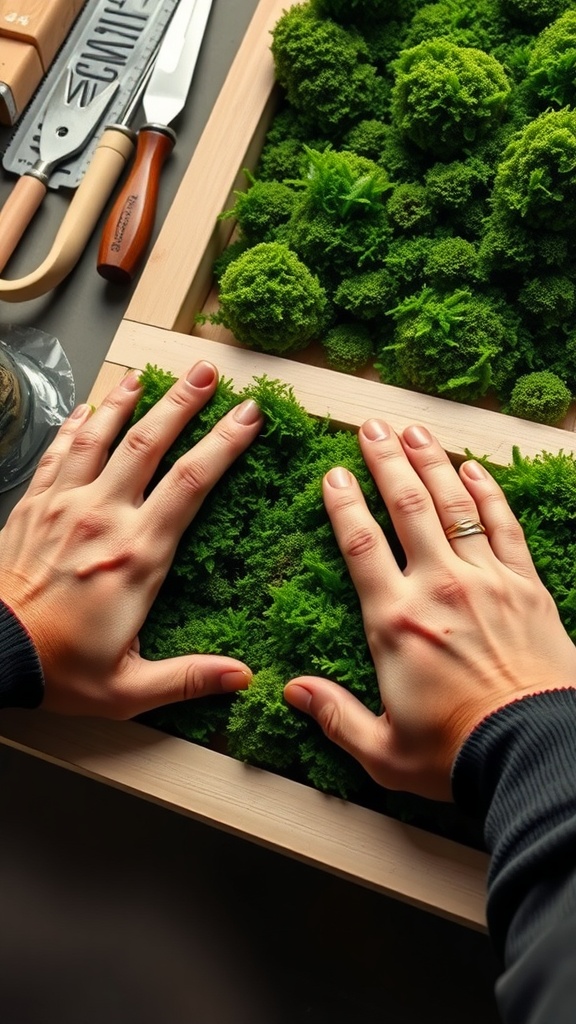
When making a moss wall, one key step is ensuring that the moss sticks firmly to your base. In the image, you can see hands gently pressing down on lush green moss. This action is crucial for creating a sturdy DIY living wall art.
The hands shown are positioned thoughtfully, squeezing the moss into the frame. It’s important to apply even pressure to avoid air pockets, making sure the moss settles nicely. Whether you’re working on a real moss wall DIY project or making a DIY moss canvas, this step will help achieve a clean look.
Take your time during this part of the process. The more secure the moss is, the longer it will retain its beauty in your indoor moss wall. This technique is vital for anyone learning how to make living moss art.
Add Variety: Mix Different Types Of Moss And Greenery
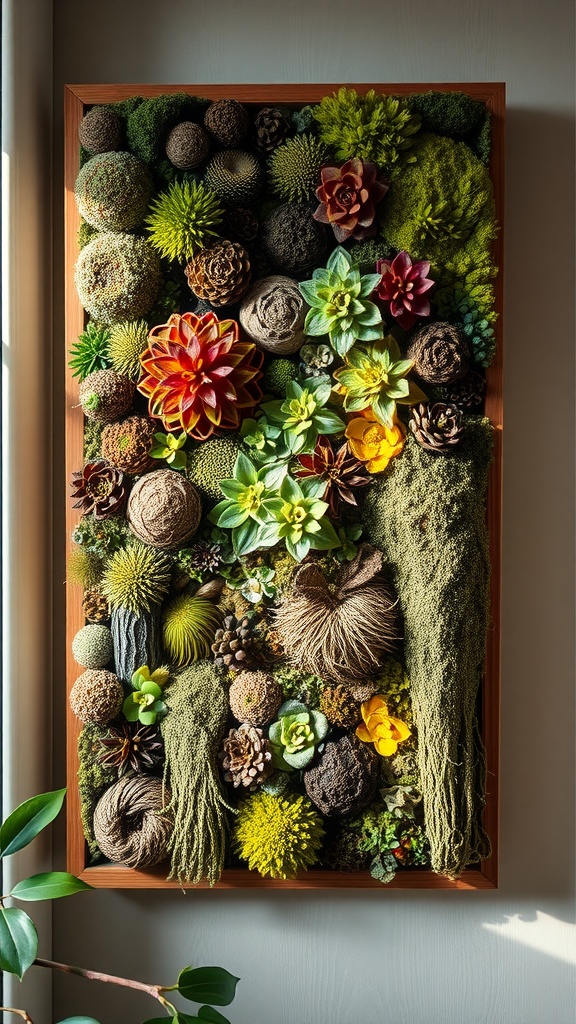
Creating a vibrant moss wall art piece is all about mixing and matching different types of moss and greenery. The image shows a stunning arrangement that combines various textures and colors, making it a perfect example of how to create a lively wall display.
Using a combination of real moss and faux greenery, you can achieve a beautiful effect. Try incorporating different moss varieties like sheet moss, reindeer moss, and even dried flowers for added depth. Each type brings unique colors and textures to your design, enhancing the overall look.
Don’t shy away from including other plants too. Succulents, for instance, can add a pop of color and contrast against the green. The bright red and yellow accents in the image highlight how such additions can elevate your DIY living wall art game. Mix them up and see what looks best!
If you want to know how to make a living moss wall, consider the arrangement. Balance your pieces to avoid overwhelming the viewer. The careful placement of each element creates a harmonious feel that draws the eye.
This wall art DIY can be a fun weekend project. You’ll feel accomplished as you watch your creation come to life, transforming your space with a touch of nature. Making a moss wall is not just about the end product; it’s also about enjoying the process!
Add Decorative Elements: Rocks, Sticks, Or Dried Flowers
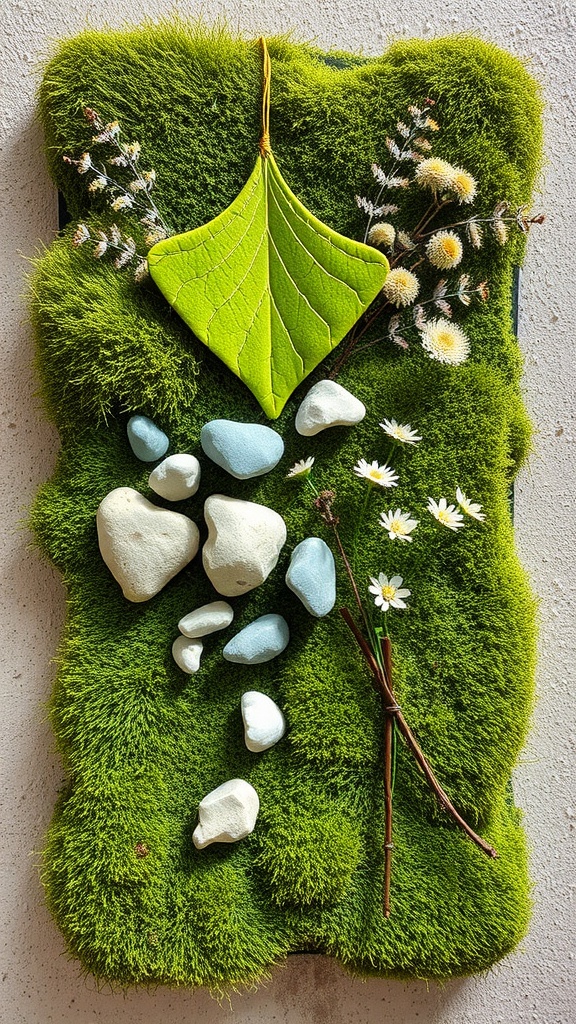
Decorating your moss wall art can take your DIY project to the next level. Imagine a canvas filled with vibrant green moss, complemented by carefully chosen decorative elements. This image showcases a beautiful example of how to effectively incorporate rocks, sticks, and dried flowers into your design.
The arrangement features smooth white and blue stones scattered among the lush moss, adding texture and contrast. You can choose stones that resonate with the color palette of your space or ones that hold personal significance. These elements can be found in your backyard or at a local crafts store, making them accessible for your DIY moss canvas.
The inclusion of dried flowers and twigs brings a touch of nature to your indoor space. Notice how the delicate white flowers and sturdy sticks create a balanced look. You can play around with different types and sizes of plants to see what fits your style. Sticks can also be used to create interesting shapes or patterns, adding a layer of creativity to your moss wall.
Incorporating a leaf in a striking green hue enhances the natural feel of the wall art. This detail not only adds color but also draws the eye, making it an engaging focal point. If you want to learn how to make living moss wall art, think about what shapes and textures you want to include. Personal touches will make your piece unique.
Remember, making a moss wall is all about expressing your style. Experiment with different elements until you find what feels right. Whether you’re creating wall art with living moss or trying your hand at a real moss wall DIY, the key is to enjoy the process!
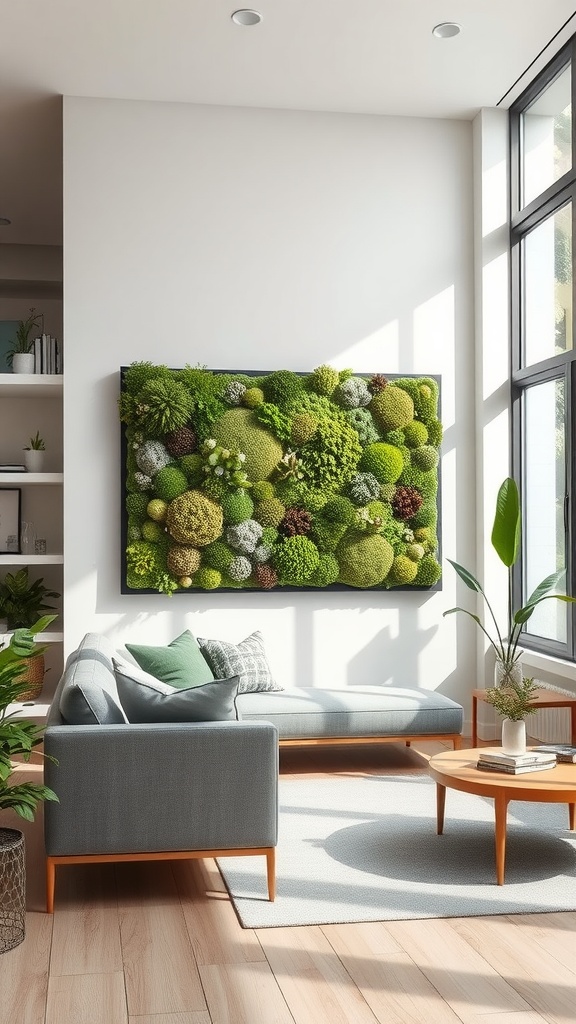
Maintain Your Moss Wall Art By Keeping It Dry And In Low Light
Moss wall art adds a refreshing touch to any room, and the photo shows a charming example of how it can enhance your space. This piece combines vibrant green moss with a modern design, showcasing how nature can blend seamlessly with interior decor.
To keep your moss wall art looking its best, it’s important to maintain the right environment. Keeping it dry is essential, as excess moisture can lead to mold or mildew. A dry space helps preserve the beauty of the moss and ensures it stays intact.
Low light is another key factor in maintaining your moss art. Direct sunlight can cause the colors to fade over time. Instead, place your piece in a spot where it receives indirect light. This will help keep the moss vibrant and lively.
For those interested in DIY projects, knowing how to make living moss wall art can be a rewarding experience. Whether you opt for a real moss wall DIY or a moss canvas, following these maintenance tips will ensure your creation stays fresh and beautiful.
With the right care, your moss wall art can become a stunning focal point in your home. So, make sure to keep it dry and out of direct sunlight to enjoy its unique charm for years to come.
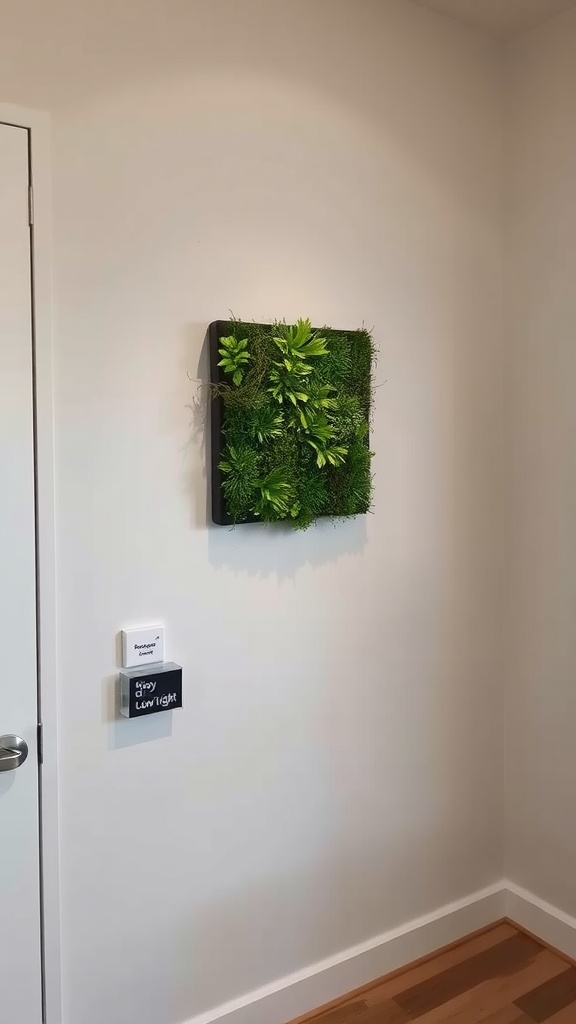
Display Your Moss Wall Art In A Well-Visible Spot For Maximum Impact
When you’ve put time and effort into making a stunning moss wall art piece, the next step is finding the perfect spot to showcase it. A well-visible area will make sure it gets the attention it deserves. Think about placing it in your living room, where family and guests can admire it. A bright wall, preferably one that receives natural light, enhances the colors and textures of your creation.
The image gives a great example of a living moss wall art installation. The vibrant greens and varied textures stand out beautifully against the clean, minimalistic background. This not only adds a pop of color but also brings a touch of nature indoors, creating a refreshing atmosphere.
Consider positioning your DIY moss canvas above a sofa or a coffee table. This arrangement invites people to pause and appreciate the work you’ve done. If you’re wondering how to make living moss, consider incorporating different types of moss and plants to create depth and interest. When making a moss wall, layering is key!
For those who want to make a real statement, a large moss wall can become a centerpiece in any room. Whether you’re working on a real moss DIY project or exploring how to make indoor moss wall art, visibility is key. You want to create an eye-catching focal point that draws viewers in.
Optionally Seal With A Preservative To Retain Color And Texture
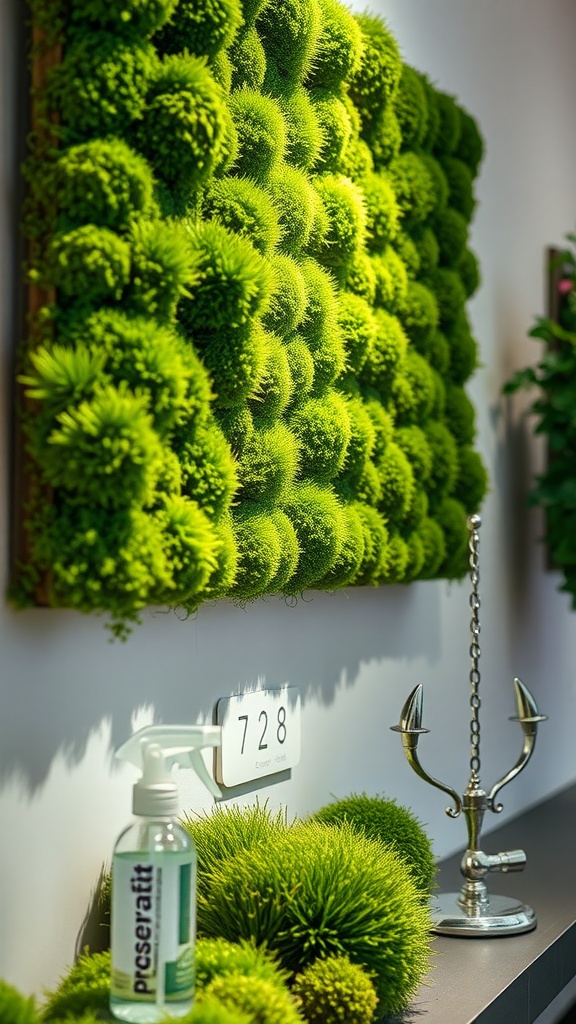
Sealing your moss wall art can be a great way to keep it looking fresh and vibrant. In the image, you can see a beautiful moss wall art piece that’s bursting with rich greens. The fluffy textures create a lively display that can brighten up any space. If you want to maintain that striking visual appeal, using a preservative is a smart choice.
Applying a preservative helps prevent fading and keeps the moss looking lively for longer. You can use a spray bottle, like the one shown in the image, to apply an even coat. Make sure to follow the instructions on the product for the best results. This step is especially important for those making a DIY living moss wall or real moss wall DIY.
If you’re unsure about the type of preservative to use, look for products specifically designed for moss or preserved plants. This will ensure that you’re not harming the natural textures you worked hard to create. From DIY moss canvas to wall art living moss, keeping your project looking its best can be simple.
So, if you’re curious about how to make DIY moss, don’t skip this sealing step. It can really make a difference in the longevity of your stunning creation!
Ensure Regular Dusting For Clean, Fresh-Looking Moss
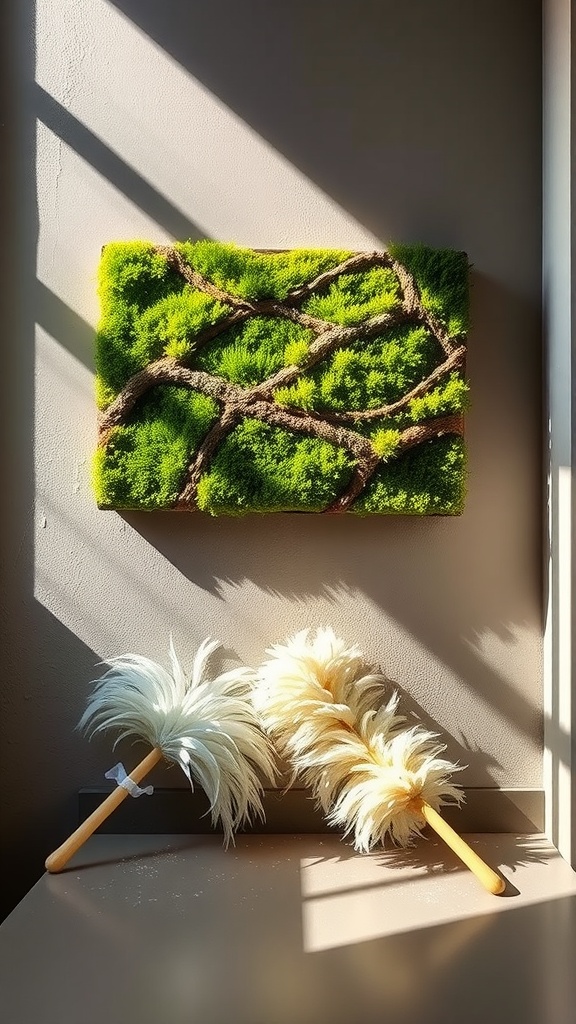
Moss wall art brings a refreshing touch to your space. To keep it looking its best, regular dusting is key. In the image, you can see a vibrant moss wall art piece illuminated by natural light. It’s framed beautifully, and in the foreground, there are dusters ready for action.
When creating your own DIY moss canvas, remember that dust can accumulate over time. Using a gentle duster helps maintain the lively appearance of your moss wall without damaging it. Just a quick flick every couple of weeks can make a huge difference.
For those wondering how to make living moss wall art, dusting is just one step. Make sure to place your art where it won’t get too much dirt or grime. This way, your creation remains a stunning focal point in your home.
Making a moss wall doesn’t have to be a chore. It can be a simple, enjoyable task, especially when you see the results! Keeping your wall art clean ensures it stays fresh and vibrant, creating a lovely indoor green vibe.
So, grab your duster and give that real moss wall DIY some love! You’ll be amazed at how a little maintenance goes a long way in keeping your DIY living wall art looking lively and inviting.
Leave a Reply