Propagating a snake plant is a simple and rewarding process that can help you fill your space with more greenery. With just a few easy methods like leaf cuttings or division, you can turn one plant into many. Plus, snake plants are known for being low-maintenance, making them perfect for those new to plant care.
Choose A Healthy Leaf From The Snake Plant
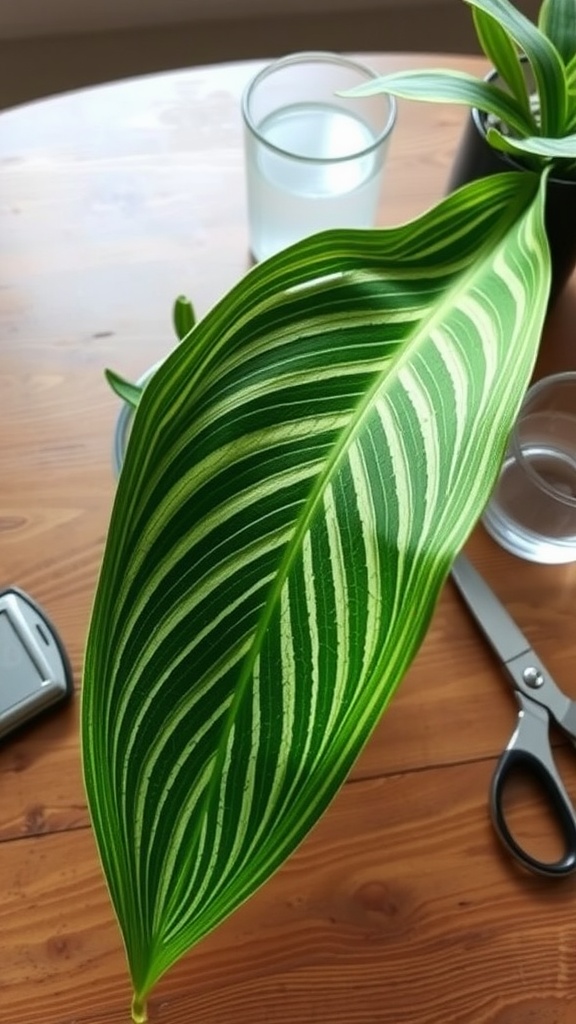
Choosing a healthy leaf is a key step in propagating your Snake Plant. Look for a leaf that is vibrant and free from blemishes. The rich green color indicates that it’s in good shape. Avoid any leaves that have brown spots or wrinkles.
In the image, the leaf looks lush with a striking pattern. This is ideal for Snake Plant propagation. Healthy leaves will root faster and grow stronger, ensuring successful propagation.
When ready to cut the leaf, use clean scissors. Make a clean cut at the base of the leaf. This helps prevent infection and encourages the leaf to thrive in its new setting. Remember, this process is part of Snake Plant care, and it can be very rewarding!
Make sure you have appropriate pots for Snake Plants propagating, as the right environment will promote growth. Now, you’re ready to move on to the next steps in snake plant propagation!
Use Clean, Sharp Scissors Or Pruners To Cut A Leaf Into Sections
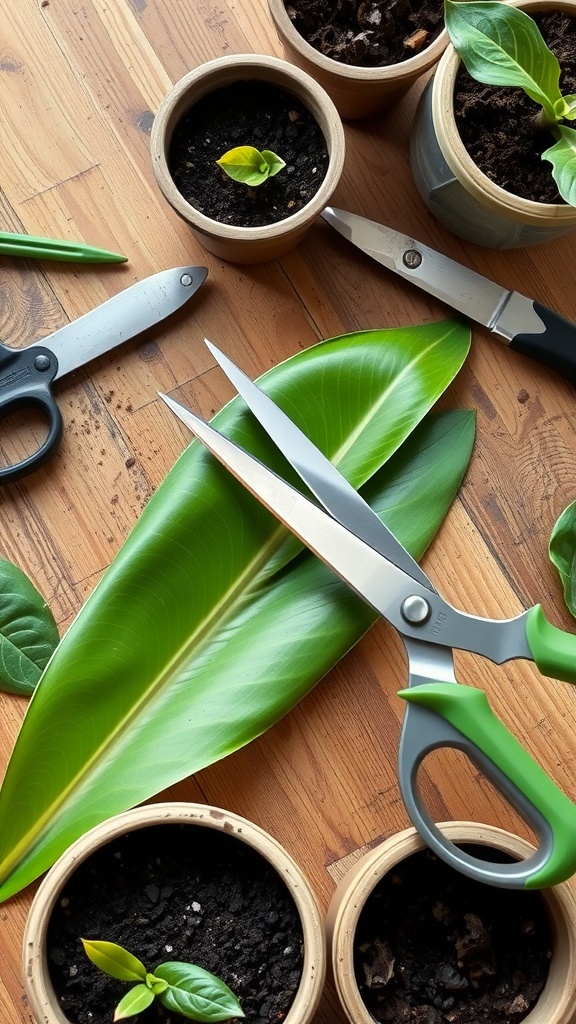
When propagating snake plants, it’s crucial to start with clean, sharp scissors or pruners. The image shows a pair of scissors poised above a vibrant green leaf, ready for cutting. This step is vital in snake plant propagation, ensuring the cuts are smooth and precise.
Cutting a healthy leaf into sections can lead to multiple new plants. Aim for sections about 4 to 6 inches long, and don’t forget to cut at an angle. This technique helps the plant absorb water better and promotes growth.
The surrounding pots in the image are perfect for your new cuttings. They should have well-draining soil to support healthy root development. Make sure to choose pots suitable for snake plants propagating, as the right environment is key for their success.
After making your cuts, place the sections in the pots, and watch as they grow into beautiful new snake plants. With a little patience and care, you’ll soon be enjoying the benefits of propagating snake plants indoors!
Let The Leaf Sections Dry For 1-2 Days To Prevent Rot
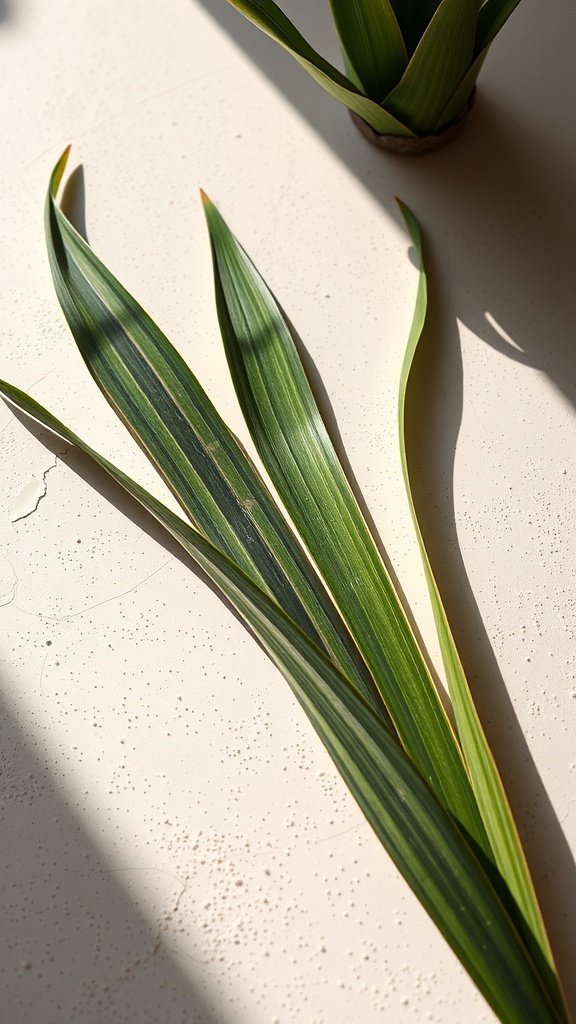
When propagating a snake plant, letting the leaf sections dry for a day or two is key. This simple step helps prevent rot, making your propagation journey smoother. In the image, you can see healthy leaf sections laid out on a light surface, soaking up the sun. This drying time allows the cut ends to callus over, creating a protective barrier against potential rot when they are eventually placed in soil.
Once these sections dry out a bit, they will be ready for planting. Remember, snake plant care is all about ensuring the right conditions for growth. Patience is crucial here! After the drying period, you’ll be on your way to having new snake plants sprouting from your propagated leaves.
Pots for snake plants propagating should be well-draining. This prevents excess water from sitting around the roots, further reducing the chance of rot. By following these tips on how to propagate snake plant, you’ll enjoy a successful propagation process and watch your indoor garden flourish.
Optionally, Dip The Cut Ends In Rooting Hormone For Faster Rooting
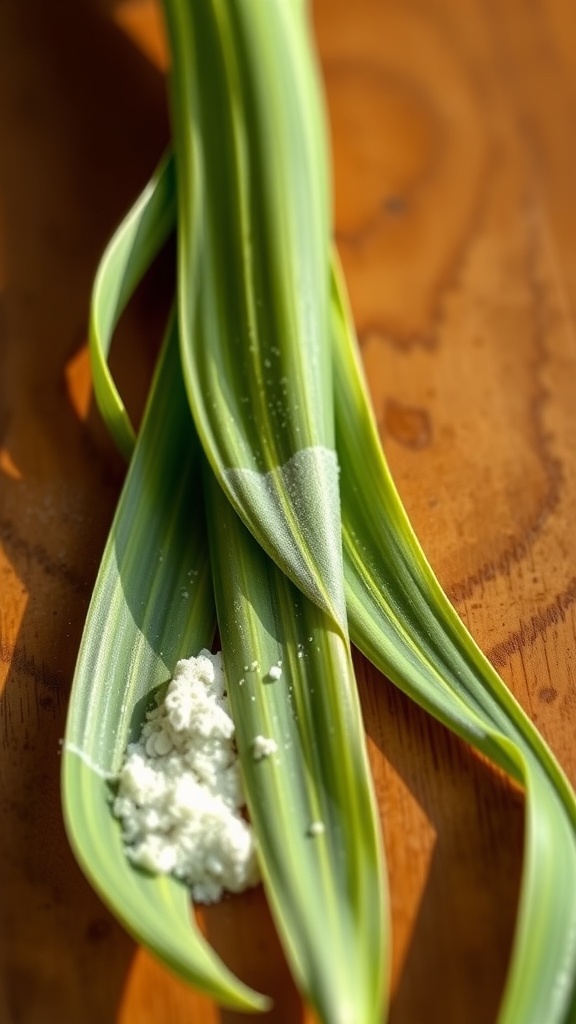
When propagating snake plants, you might come across a handy tip: using rooting hormone. In the image, we see beautiful green leaves of a snake plant lying on a wooden surface, accompanied by some white rooting powder. This is a great visual reminder of the steps involved in snake plant propagation.
Rooting hormone can supercharge your propagation process. After you cut the leaves, dipping the ends in this powder encourages quicker rooting. This is particularly helpful for those who want to expand their snake plant collection faster. Snake Plant Care becomes much simpler with this little boost!
Many plant enthusiasts have found that using rooting hormone can lead to stronger and healthier roots. It’s an easy step to include in your snake plant propagation routine. So, next time you think about propagating snake plant, remember this tip!
Whether you’re using pots for snake plants propagating or just sticking them in water, this trick can make a noticeable difference. It’s all part of how to propagate plants effectively, especially with snake plants, which are known for their resilience and adaptability.
Prepare A Well-Draining Potting Mix (Cactus Or Succulent Mix Works Well)
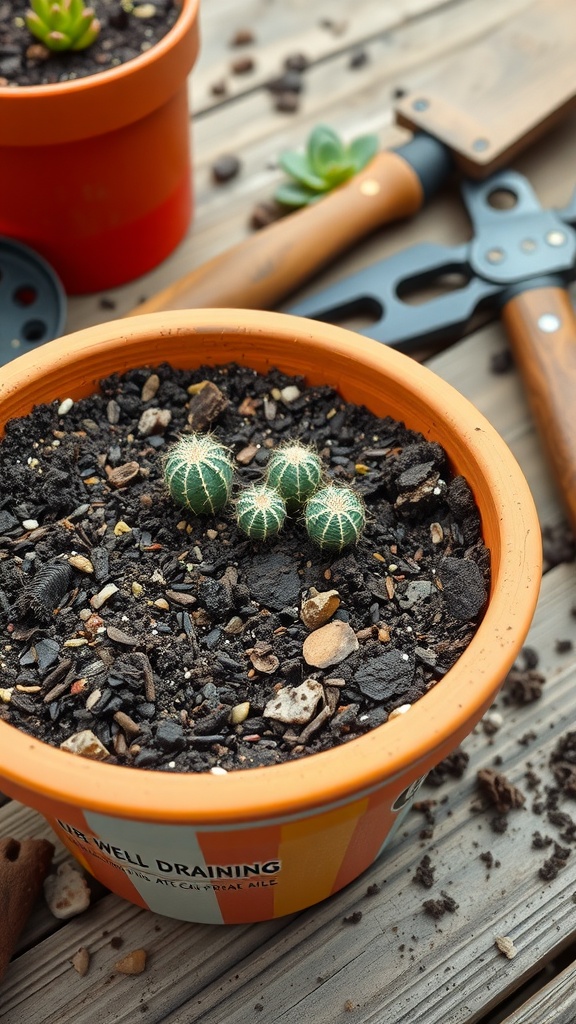
Creating a perfect environment for your snake plant is key to successful propagation. The image beautifully showcases a well-draining potting mix that’s ideal for these hardy plants. Notice the small pebbles and organic matter mixed in the soil, which helps with drainage.
When you’re propagating snake plants, you want to avoid waterlogged roots. Using a cactus or succulent mix not only allows excess water to escape but also provides good airflow to the roots. This type of soil is specifically designed to support the needs of snake plant care.
Make sure your pots for snake plants propagating have adequate drainage holes. This will help keep your plants healthy and thriving. Snake plant propagation can be a fun and rewarding process, especially when you see new growth sprouting from your cuttings. Get your hands dirty and enjoy the process of how to propagate snake plant with the right mix!
Plant The Leaf Cuttings In The Soil, Ensuring The Correct Orientation
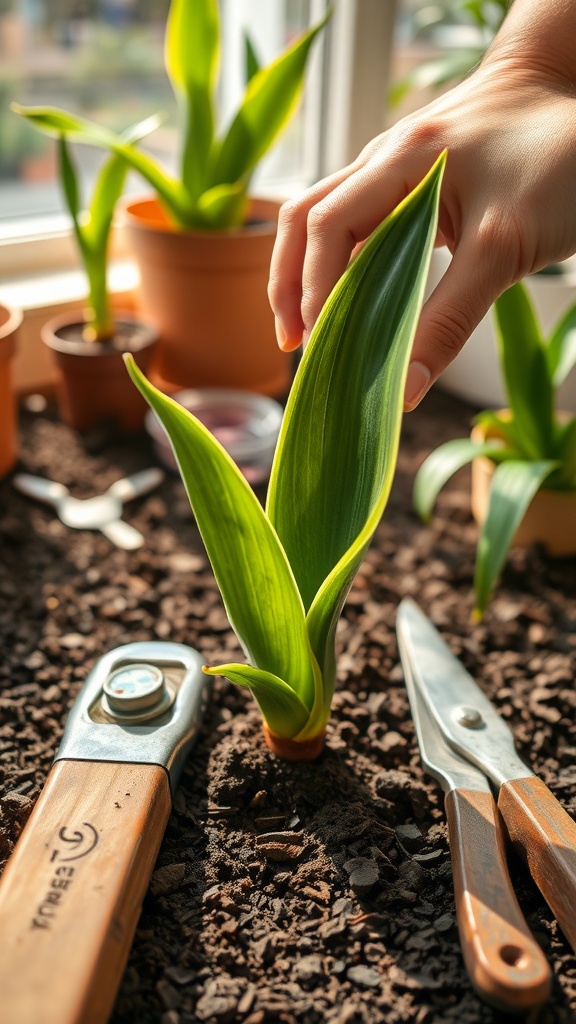
When propagating a snake plant, it’s key to plant the leaf cuttings in the right direction. The image shows someone carefully placing a leaf cutting into the soil. This step is important for the cutting to take root and grow successfully.
Before planting, make sure the leaf cutting is healthy and has been allowed to callous over for a few days. This helps prevent rot when it’s placed in the soil. Position the cutting so that the end that was cut is buried in the soil, while the top remains above the surface.
Choose suitable pots for snake plants propagating. Small terracotta pots work well because they allow drainage. Good drainage is vital for snake plant care, preventing water from pooling and causing issues.
After planting, provide enough light but avoid direct sunlight. Snake plants thrive indoors and can adapt to various lighting conditions, making them perfect for your home. With the right care, your snake plant propagation journey will be rewarding, and soon you’ll have new plants to enjoy!
Water Lightly, Keeping The Soil Slightly Moist (Avoid Overwatering)
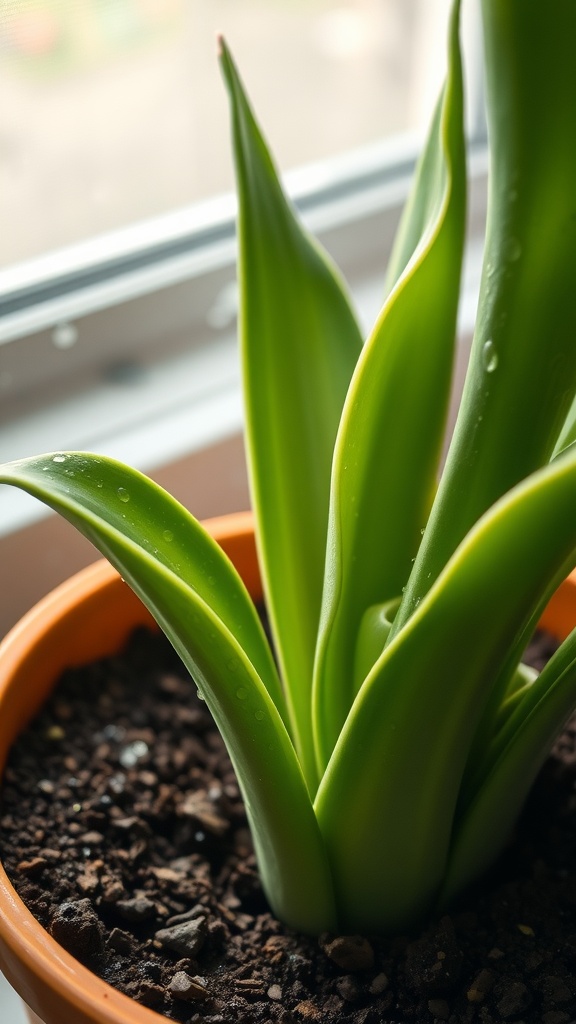
In the image, we see a vibrant snake plant with healthy, glossy leaves. This plant thrives when you pay attention to its watering needs. Snake plants are pretty forgiving but can suffer if you overwater them.
When propagating snake plants, it’s essential to keep the soil slightly moist, not soggy. This helps the roots develop without drowning. If you’re wondering how to propagate snake plant cuttings, ensure you choose pots for snake plants propagating that have good drainage.
Light watering is key. Check the soil every few days. If it feels dry a couple of inches down, it’s time for a light soak. Remember, snake plant care is all about balance. Too much water can lead to root rot, while too little can hinder growth. Keep an eye on those leaves; they will tell you when they’re happy!
Place The Cuttings In A Warm, Bright Spot With Indirect Sunlight

When propagating snake plants, finding the right spot for your cuttings is key. The image shows a vibrant snake plant sitting by a window, soaking up the soft, indirect sunlight. This is the ideal environment for your new plant babies.
Snake plants thrive in warm conditions, and bright but indirect light helps them grow strong roots. Ideally, place your cuttings on a windowsill where they can enjoy the warmth without being scorched by direct sunlight.
Using clear pots can also be a bonus. You’ll be able to watch the roots develop in real time, making it easier to know when to transfer them into pots for snake plants propagating. Keeping an eye on your plants gives a sense of connection as you learn how to propagate plants.
Remember, the right placement not only helps your snake plant cuttings grow, but it also adds a touch of green to your indoor space. So, set them up in a cozy spot, and watch them thrive!
Cover The Pot With A Plastic Bag Or Dome To Create A Humid Environment
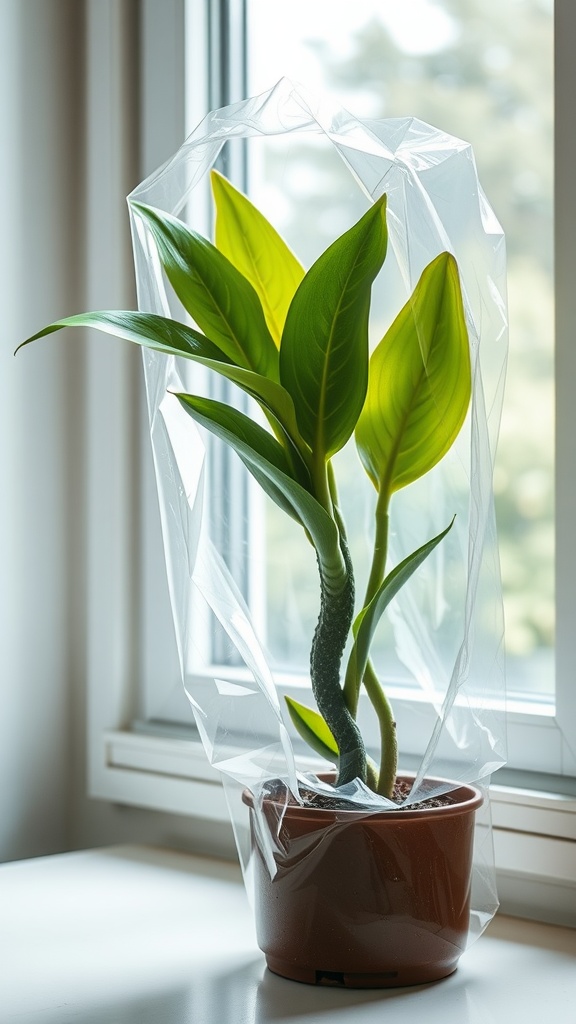
When propagating snake plants, creating a humid environment is key. The image shows a healthy snake plant in a pot, covered with a plastic bag. This simple step helps retain moisture, which is vital for root development.
The plastic covering creates a mini greenhouse effect. It keeps the humidity levels high, simulating the plant’s natural habitat. This is especially useful for snake plant propagation, as they thrive in these conditions.
Using pots for snake plants propagating, make sure to keep the bag or dome secured. This prevents excess moisture from escaping while allowing some air circulation. This balance is important for healthy growth.
As the snake plant adjusts to its new environment, you’ll notice new roots starting to form. Regularly check the moisture level in the soil. Keep it slightly damp, but not soggy. This will ensure your propagation process is a success.
Mist The Cuttings Occasionally To Maintain Humidity Without Overwatering
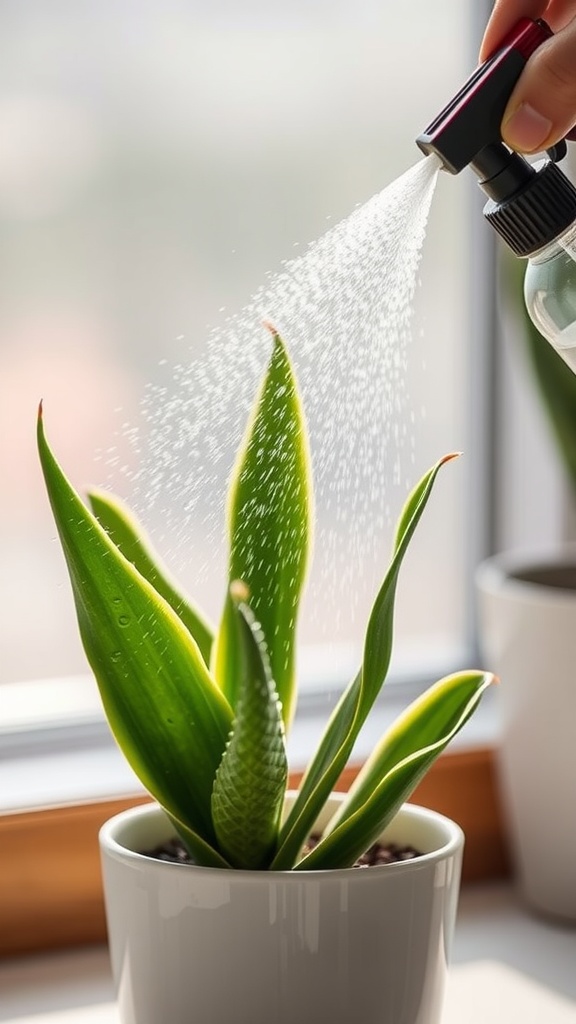
Keeping your snake plant cuttings happy is all about humidity. In the image, a hand is misting a vibrant snake plant, showcasing the care you can provide. This simple act of misting helps to maintain the moisture level around the leaves without drowning the roots.
When propagating snake plants, you want to ensure they feel comfortable in their new environment. Misting the cuttings from time to time keeps the air around them humid, which is ideal for growth. It’s a gentle way to mimic the natural conditions they thrive in.
Remember, while humidity is key, you also want to avoid overwatering. Too much water can lead to root rot. So, find that balance! This is where misting comes in handy, providing just the right touch for your snake plant propagation efforts.
For those new to snake plant care, knowing when to mist is part of the learning process. Keep an eye on the moisture levels in the soil and adjust how often you mist as needed. Happy propagating!
Check For Root Development In 4-6 Weeks By Gently Tugging On The Cuttings
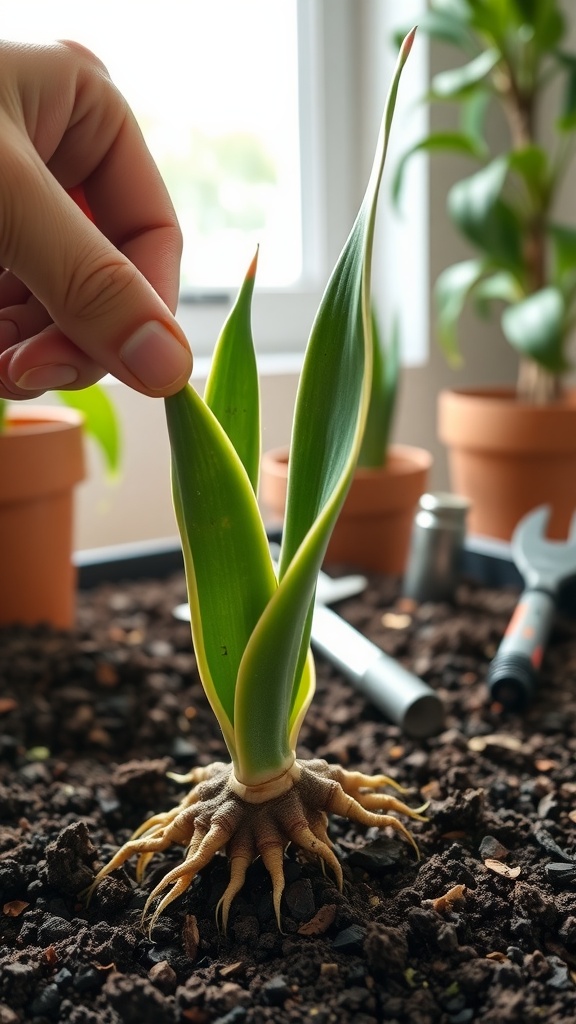
After you’ve taken the time to propagate your snake plant, patience is key. About 4 to 6 weeks later, it’s time to check on those cuttings. Gently tugging at the new shoots is a simple way to see if roots are forming. If you feel some resistance, that’s a promising sign that roots are developing nicely.
In the image, a healthy snake plant cutting is being inspected. The roots, beautiful and strong, suggest it’s well on its way to rooting. This hands-on check can create excitement as you see your efforts in action. If the cuttings move too easily, they may need more time in the soil.
Remember, proper snake plant care includes providing the right lighting and watering conditions while these cuttings establish themselves. Keeping them in pots for snake plants propagating can help you monitor their growth effectively. This process is part of how to propagate snake plant, leading to a thriving indoor plant collection.
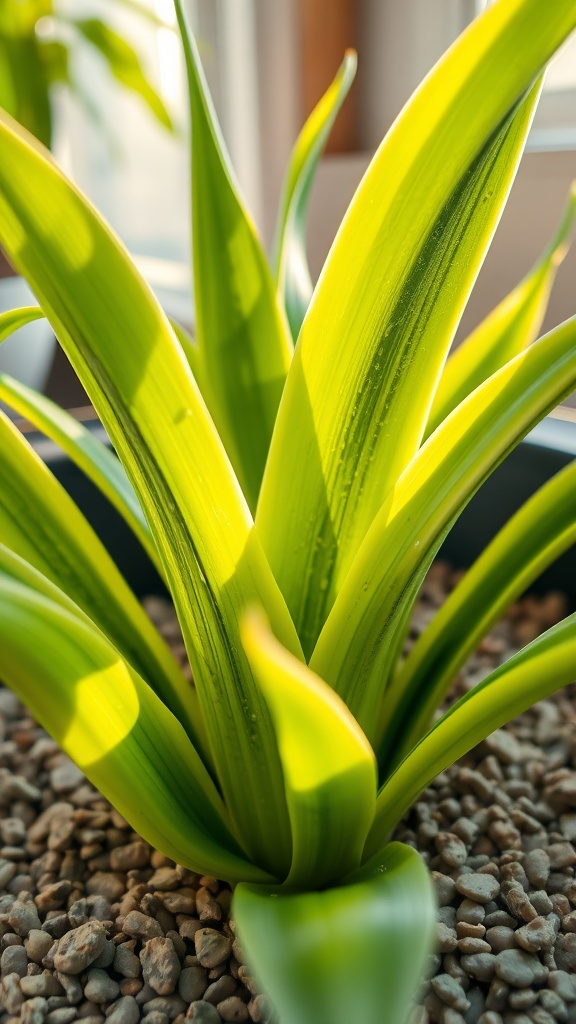
Once Roots Are Well-Developed, Remove The Plastic Cover Gradually
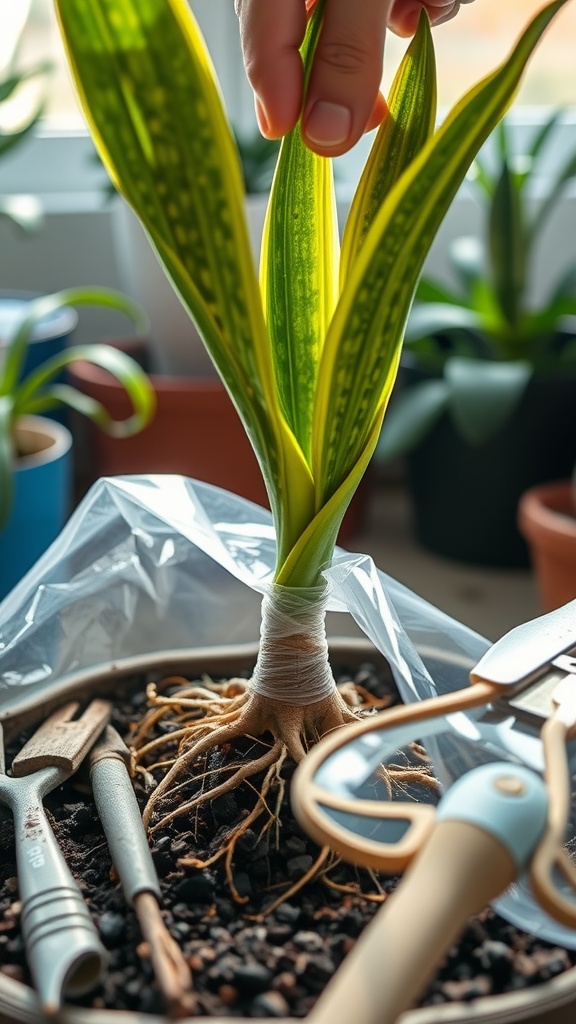
In the image, we see a healthy Snake Plant, also known as Sansevieria, with its vibrant green and yellow leaves. The roots are well-established and visible, showing signs of strong growth. A plastic cover wraps around the base, providing a humid environment for the roots to thrive. This is a common practice in propagating Snake Plant to enhance root development.
Once your Snake Plant’s roots are looking robust, it’s time to start removing that plastic cover. Do this gradually. It helps to acclimate the plant to the normal air environment. This step is key in ensuring that your new plant adapts well without shock. The gradual removal allows the plant to adjust to lower humidity levels, which is important for healthy Snake Plant care.
Keep an eye on the leaves as you remove the cover. If they start to droop or show signs of stress, consider extending the cover for a few more days. This is part of how to propagate Snake Plant successfully. It’s all about listening to your plant!
When propagating Snake Plant, using the right pots for Snake plants propagating can make a difference too. Ensure the pot has good drainage to prevent any issues. Happy propagating!
Transplant The Rooted Cuttings Into A Larger Pot
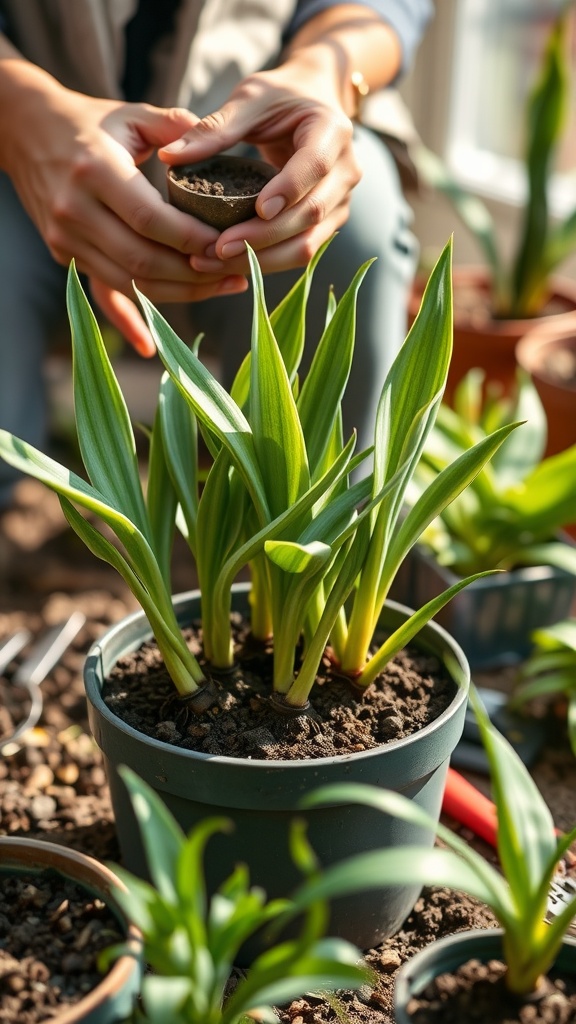
After successfully propagating your snake plant, it’s time for an exciting step: transplanting the rooted cuttings into larger pots. This process is crucial for their growth and health. You can see in the image someone holding a pot ready for planting. It highlights the importance of preparing your materials before you start.
Choosing the right pots for snake plants propagating is key. Look for containers that are not too big but allow room for the roots to thrive. Make sure the pots have drainage holes to prevent water from sitting, which could harm the roots.
Once you have your new pots ready, gently remove the rooted cuttings from their current container. Be careful not to disturb the roots too much. Place them in the new pot, and fill it with fresh potting mix, ensuring the soil covers the roots well. This boosts their chances of adapting to their new home.
After planting, give them a bit of water, but don’t overdo it. Snake plant care involves allowing the soil to dry out between waterings. These plants are forgiving, making them ideal for beginner gardeners. With the right care, your snake plants will flourish and grow beautifully indoors.
Water Regularly, Allowing The Soil To Dry Between Waterings
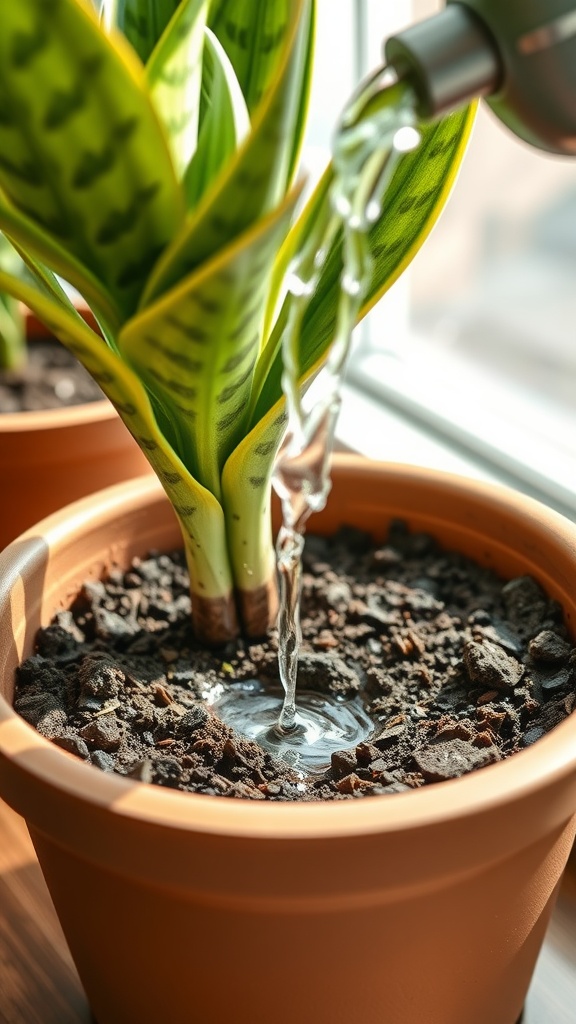
Watering your snake plant can feel tricky, but it’s straightforward once you get the hang of it. The image shows a lovely snake plant receiving a good drink. The water is flowing from a watering can directly onto the soil, which is essential for maintaining healthy growth.
Snake plants thrive in well-drained soil, so it’s key to let the top layer dry out between waterings. This prevents root rot, which these plants can be sensitive to. You want to make sure that the soil is dry about an inch down before you consider giving it another drink.
When propagating snake plants, proper watering is equally important. After you cut the leaves and place them in pots for snake plants propagating, keep the soil slightly moist, but not soaked. This balance helps new roots develop without drowning them.
If you’re wondering how to propagate snake plant successfully, remember that the right watering routine supports growth. Snake plant care doesn’t have to be complicated; just follow these simple watering guidelines, and your plants will reward you with healthy, vibrant leaves.
Fertilize Lightly In The Growing Season To Encourage Strong Growth
In the image, we see a beautiful snake plant with vibrant green and yellow leaves, thriving in its environment. This striking appearance is a reminder of how essential proper care is for snake plants, especially during their growing season.
When learning how to propagate snake plant, one key step is to fertilize lightly. Giving your plant a gentle boost can encourage strong growth. During the active growing months, a balanced fertilizer diluted to half strength can work wonders.
It’s important to choose the right pots for snake plants propagating. Ensure they have drainage holes to prevent water from sitting at the bottom. Over time, consistent care, including light fertilization, will show in the health and robustness of your snake plant.
With proper snake plant care, you’ll enjoy a lush indoor garden. Keep an eye on your plant’s growth and adjust fertilization as necessary. Happy propagating!
Leave a Reply