Ready to fill your space with more of those gorgeous Monstera leaves? This step-by-step guide walks you through the simple process of propagating your Monstera, helping you grow new plants from cuttings like a pro. Whether you’re a seasoned plant lover or just starting out, you’ll find straightforward tips to make propagation a breeze.
Select A Healthy Stem With At Least One Node
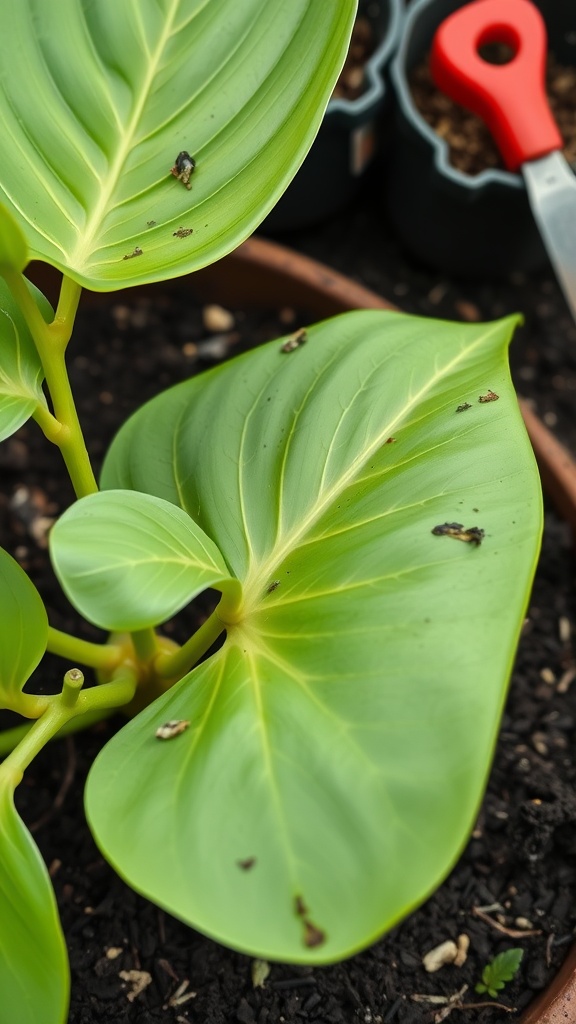
When propagating a Monstera, starting with a healthy stem is key. In the image, you can see a vibrant Monstera plant with lush green leaves. Look for stems that have at least one node. The node is where new growth will emerge, making it essential for successful propagation.
Check the stem for any signs of damage. A healthy stem should be firm and free from blemishes. If you find stems with nodes and good leaf structure, you’re on the right track! This is crucial for learning how to grow Monstera plants successfully.
After selecting your stem, you’ll want to make a clean cut just below the node. Using clean scissors or shears can help prevent any damage. This step is part of the process when learning how to separate Monstera plants.
Use Clean, Sharp Scissors Or Pruners To Make A Precise Cut
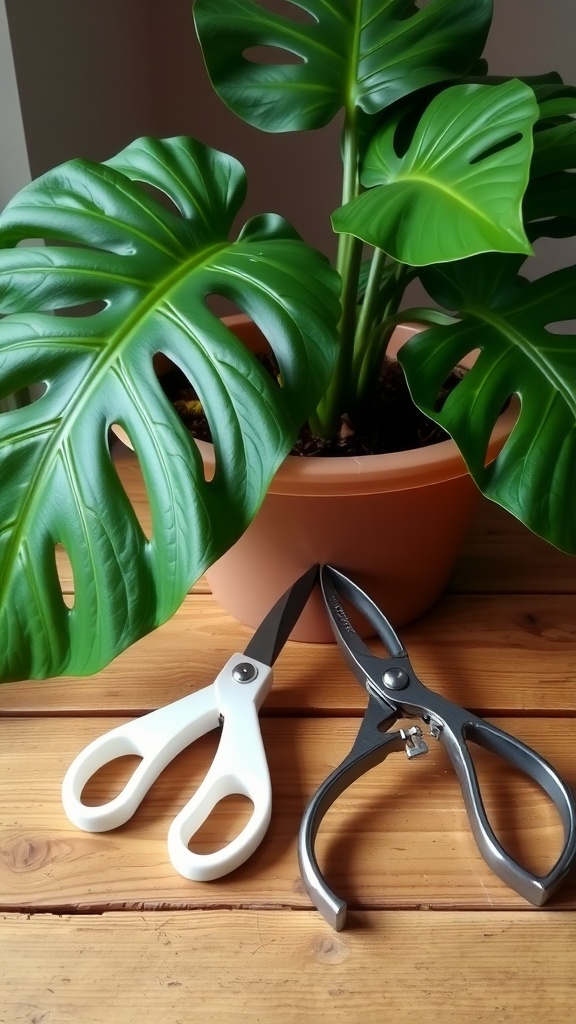
To propagate Monstera, you want to start with the right tools. This image shows two pairs of scissors: a white pair and a heavy-duty pruner. Both are perfect for making clean cuts on your Monstera plant.
Using sharp, clean scissors prevents damage to your plant and reduces the risk of introducing diseases. The white scissors are great for smaller cuts, while the pruners can tackle thicker stems. Always ensure your tools are sterilized before use.
When you’re ready to propagate, look for a healthy stem with a few nodes. These nodes are essential for new growth. A precise cut just below a node will give you the best chance to succeed in propagating a Monstera.
For those wondering when to repot Monstera plants, it’s often best after successful propagation. You can also think about how to tie up Monstera plants for added support once they’ve rooted and grown. Enjoy the process and watch your new plants thrive!
Ensure The Cutting Has An Aerial Root Or Node For Best Results
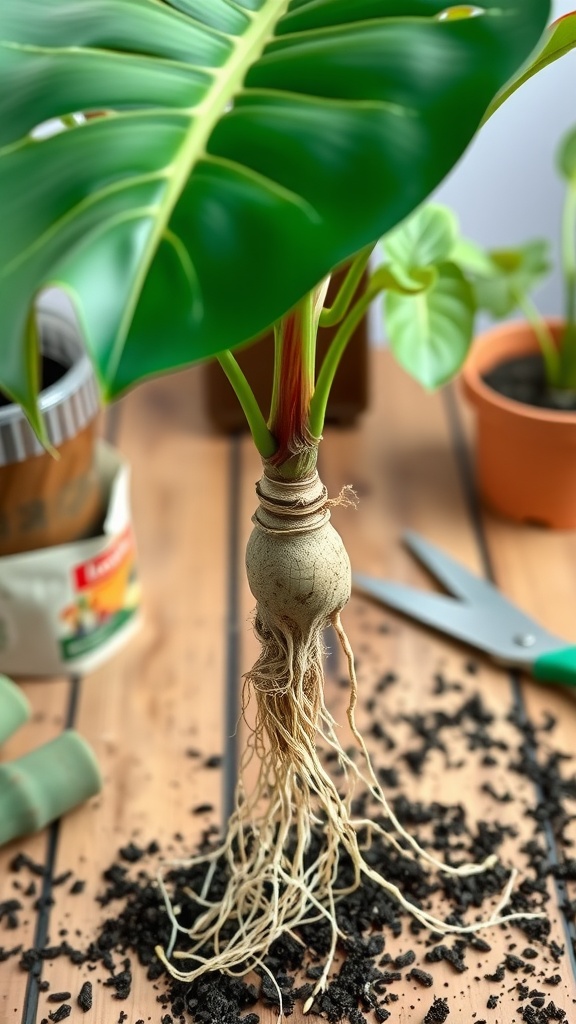
When propagating your Monstera, having a cutting with an aerial root or a node is key. This image shows a healthy Monstera cutting with a prominent aerial root, which is a great sign. Aerial roots are like little helpers for the plant, allowing it to absorb moisture and nutrients from the air.
Using a cutting with a node is another excellent option. Nodes are those little bumps on the stem where new growth occurs. When you have a node, you’re setting up your Monstera for success. It’s where the new roots and leaves will sprout.
Both aerial roots and nodes increase the chances of successful propagation. If your cutting has either, you’re on the right path. Remember, the more robust the root system, the better your Monstera will do once you plant it. So when you’re learning how to grow Monstera plant or figuring out how to repot Monstera deliciosa, keep an eye out for these features.
Let The Cutting Dry For A Few Hours To Prevent Rot
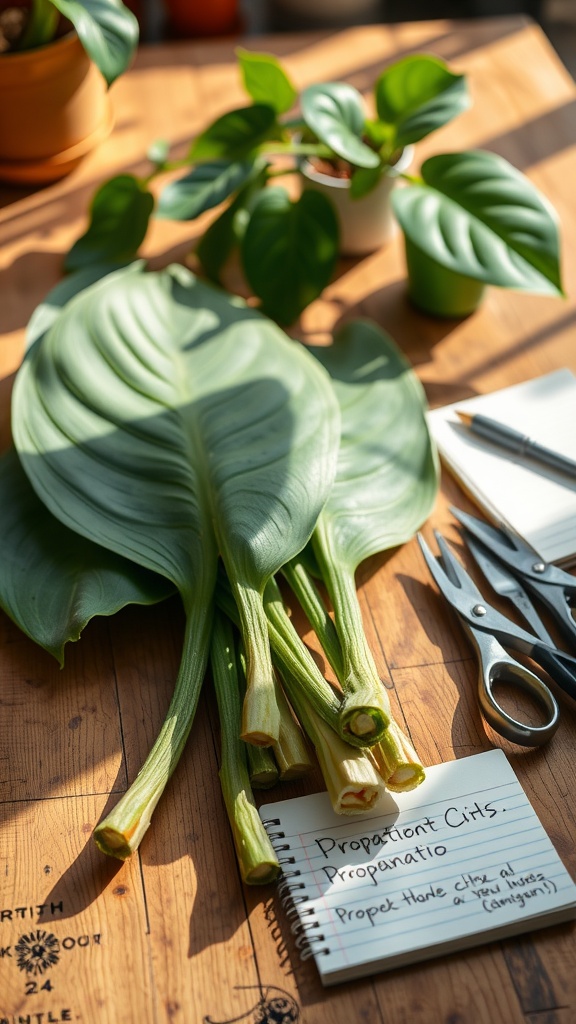
In the image, you see fresh Monstera cuttings laid out on a wooden surface. The bright green leaves showcase their beautiful texture, while the nearby pots hint at a thriving indoor garden. A pair of scissors and a notepad with notes about propagation are also present, emphasizing the importance of preparation.
After you’ve cut your Monstera, let the cuttings dry for a few hours. This step is key in preventing rot when you plant them. Allowing the ends to callous helps them absorb water better once planted. Think of it as giving your plant a little break before jumping into its new home.
While you wait, take a moment to consider how to repot your Monstera plant later. Understanding when to repot Monstera plant can help it thrive in its new environment. Plus, it’s a great time to plan for styling your Monstera plant in your space.
Remember, propagating a Monstera is rewarding. With proper care during this drying phase, you set your plant up for success. Keeping a light hand on watering after planting will also help, so you avoid over-saturation. Enjoy the process, and soon you’ll have even more Monstera beauties to love!
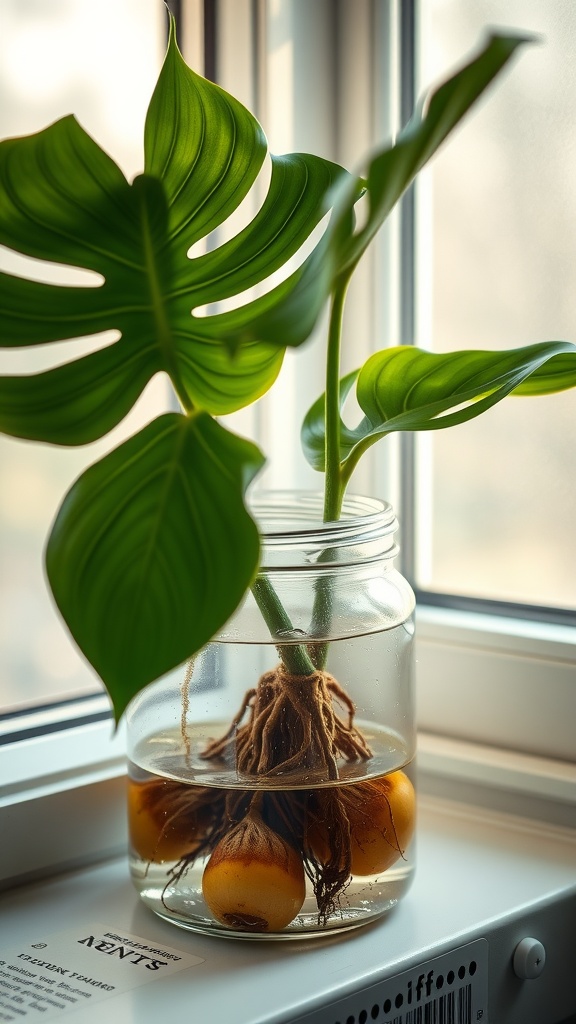
Place The Cutting In A Jar Of Water, Submerging The Node
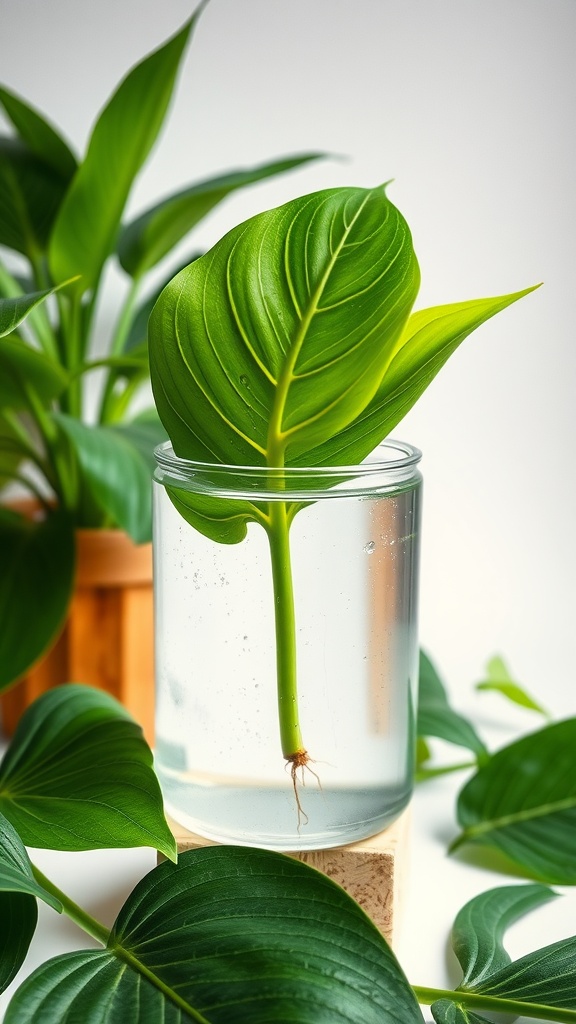
After you’ve taken your cutting from the Monstera, it’s time for the fun part: placing it in water! Fill a jar with clean water and make sure to submerge the node, which is the part where the leaf meets the stem. This is crucial for root growth.
The image shows a healthy Monstera cutting standing tall in a clear jar of water. You can see the roots starting to develop at the bottom, a sure sign of a successful propagation. The vibrant green leaf above the water looks fresh and ready to thrive.
Make sure the jar is positioned in a spot with bright, indirect light. Too much direct sunlight can harm the cutting, while too little light can slow down root development. Checking the water level regularly is a good idea too, as you want to keep the node submerged but not the entire cutting.
In a few weeks, you should start seeing roots forming. This is a key step in propagating a Monstera. Once the roots are a few inches long, you can think about potting it. Remember, knowing how to repot a Monstera deliciosa properly will help it thrive in its new home!
Change The Water Every Few Days To Keep It Fresh
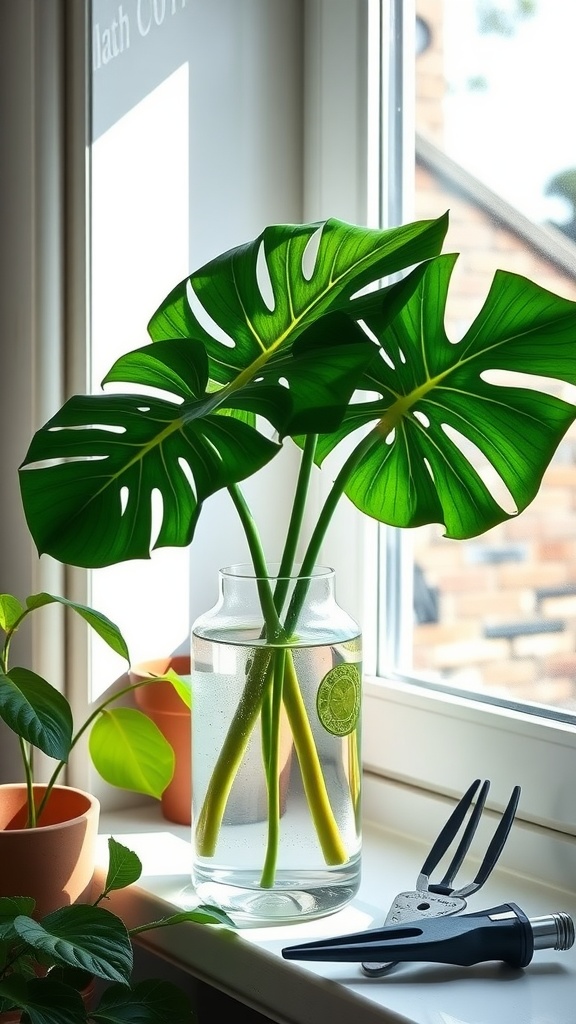
Keeping your Monstera cuttings in fresh water is key to their health and growth. The image shows a beautiful setup with vibrant green Monstera leaves placed in a clear vase filled with water. This setup not only looks great but serves a purpose. The fresh water allows the roots to absorb nutrients and stay hydrated.
It’s a good practice to change the water every few days. Stagnant water can lead to bacteria growth, which can harm your cuttings. A simple refresh keeps everything clean and helps your plant thrive.
While changing the water, take a moment to check the cuttings for any signs of rot. If you notice any browning or mushy spots, trim those off to encourage healthy growth. Remember, propagating a Monstera requires a bit of attention, but it’s rewarding.
This routine not only supports root development but also contributes to the overall health of your Monstera plant. Once you see roots sprouting, you’ll feel accomplished and ready to learn more about how to grow Monstera plant successfully. You might even find yourself eager to discover how to repot Monstera Deliciosa when the time comes!
Keep The Cutting In Bright, Indirect Light
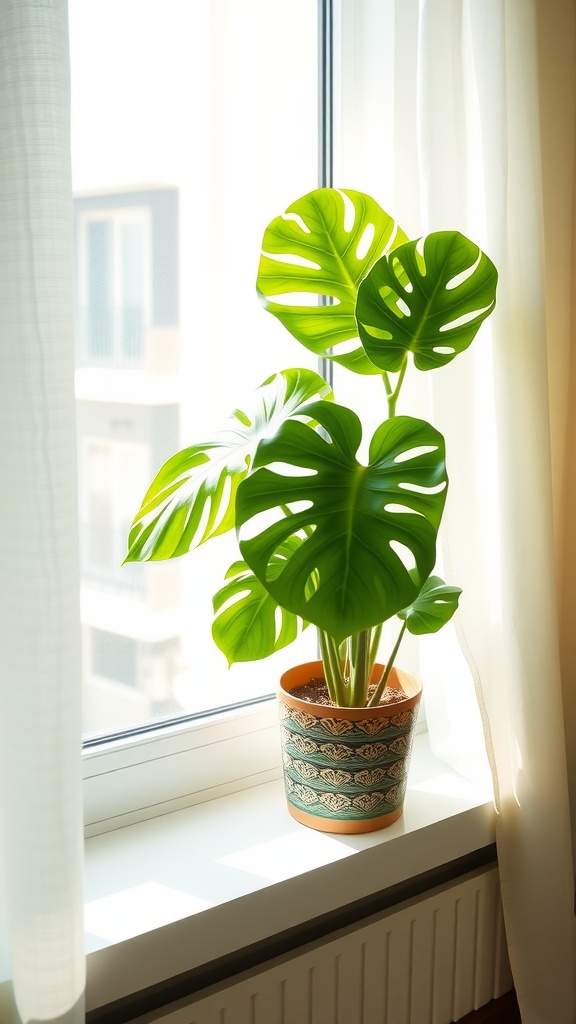
Having the right light is key when propagating a Monstera. The image shows a healthy Monstera plant sitting in bright, indirect light by a window. This setup is ideal for your cutting. Too much direct sunlight can scorch the leaves, while too little light can stunt growth.
Placing your cutting near a window with sheer curtains can help filter the light. This way, your Monstera gets the brightness it needs without the harsh rays. Remember, healthy light promotes healthy growth.
Incorporating this practice into your Monstera plant hacks ensures your plant is thriving. You’ll also notice better roots forming as it adjusts to its new environment. So, if you’re wondering how to grow your Monstera plant successfully, start with the right lighting.
Maintain Warm Temperatures (65°F To 85°F) For Optimal Rooting
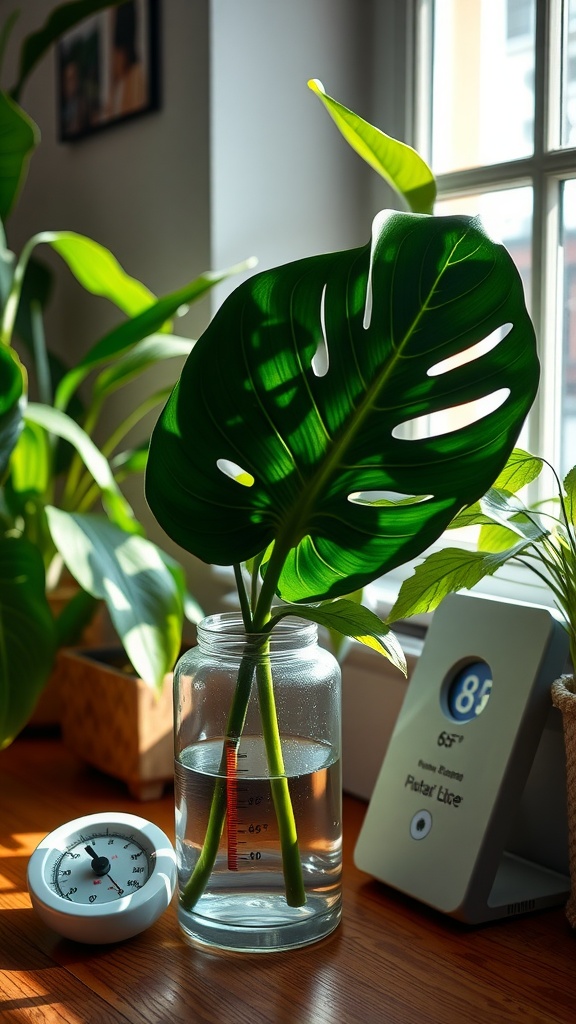
Propagating a Monstera can be a rewarding experience, especially when you see those new roots forming. In the image, you can spot a healthy Monstera cutting placed in a jar of water, which is the perfect setup for rooting. The thermometer indicates a cozy 65°F to 85°F, reminding us how crucial temperature is for this process.
To get your Monstera to thrive, keep it in a warm spot. The ideal temperature range helps speed up root development and keeps the plant happy. If the temperature is too low, it can slow down or stop growth altogether. So, make sure to keep an eye on those numbers.
You might also notice that the leaf is vibrant and healthy. This is a good sign that the plant is well cared for. When propagating a Monstera, it’s essential to choose cuttings with strong, healthy leaves, as they will contribute to proper growth once roots are established.
In addition to temperature, consider light conditions. A bit of indirect sunlight can do wonders while the plant establishes roots. Soon enough, you’ll be ready to separate your Monstera or even learn how to repot Monstera Deliciosa to encourage further growth.
Wait 2-6 Weeks For Roots To Develop
After you’ve taken a cutting from your Monstera, it’s time to play the waiting game. This phase is crucial for propagating a Monstera. You’ll want to place your cutting in water, just like in the image. You can see the beautiful green leaves and the roots starting to grow, which is an encouraging sign.
During this 2-6 week period, keep the cutting in a bright spot, but out of direct sunlight. It’s normal to feel excited, but patience here pays off. The roots will develop more robustly with proper care.
Check the water level regularly, ensuring the roots stay submerged. If you notice the water getting cloudy, it’s a good idea to change it. This will help keep your cutting healthy as it prepares to grow into a full plant.
Once the roots are at least a few inches long, you can think about how to repot Monstera Deliciosa. You’re on your way to having a thriving plant! If you’re curious about how to tie up Monstera plant or want to learn about Monstera plant styling, there’s plenty to explore once those roots are ready.
Transplant The Rooted Cutting Into Well-Draining Soil

Now that you’ve successfully propagated your Monstera, it’s time to move the rooted cutting into a new home. The image shows a healthy Monstera cutting with strong roots, nestled in a pot of rich, dark soil. This is a crucial step in the process of how to grow Monstera plant effectively.
Choosing the right pot is essential. Look for a container with drainage holes to prevent water from accumulating. Monstera loves well-draining soil, so opt for a mix designed for tropical plants. Once you have your pot ready, gently lift the rooted cutting, being careful not to disturb the roots too much.
Place the cutting in the center of the new pot and fill in with soil, patting it down gently. Make sure to leave a little space at the top so water can collect without spilling over. This planting technique is key when considering when to repot Monstera plant, as it helps the plant establish itself quickly.
After you’ve planted your Monstera, give it a good watering. This helps to settle the soil around the roots. Keep an eye on your plant as it adjusts to its new environment. Propagating a Monstera can be a rewarding experience, and watching it thrive is one of the best parts!
Water Lightly And Let The Soil Dry Between Waterings
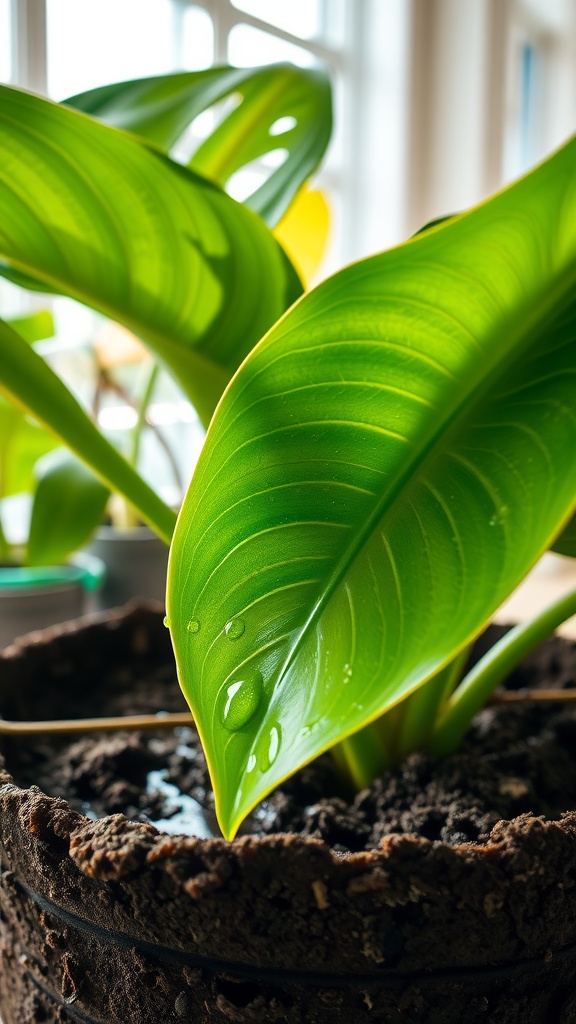
In the image, we see a lush Monstera leaf with droplets of water glistening on its surface. This visual captures the essence of proper watering techniques. When propagating a Monstera, it’s essential to strike the right balance with water.
Watering lightly means giving your Monstera just enough moisture to thrive without drowning its roots. The soil should feel dry to the touch before you water again. This practice encourages strong root growth and overall plant health.
Knowing when to water can be tricky. A good rule of thumb is to check the soil moisture. If it feels dry an inch below the surface, it’s time to water. This ensures you’re not overwatering, which can lead to root rot.
When you’re figuring out how to grow a Monstera plant, remember that less is often more. Eyeing that shiny leaf may tempt you to give it a drink, but patience will pay off. With proper care, your Monstera will reward you with beautiful, vibrant foliage.
If you’re also curious about how to repot Monstera Deliciosa, timing it after a good watering can help make the process smoother. Proper soil moisture can ease the transition and support the plant’s health. So, keep an eye on your watering practices!
Provide Regular Fertilization During The Growing Season

Fertilizing your Monstera is key to keeping it healthy and thriving. The image shows someone gently pouring liquid fertilizer onto a large, glossy leaf. This simple action can make a big difference in the plant’s growth.
During the growing season, which typically runs from spring to early fall, your Monstera will benefit from regular feeding. Use a balanced, water-soluble fertilizer about every 4-6 weeks. This will give your plant the nutrients it needs to grow strong and vibrant.
When you begin propagating a Monstera, it’s important to remember that young plants have different needs than mature ones. New cuttings might require a diluted fertilizer to avoid overwhelming them. As your plant grows, you can increase the strength of the fertilizer.
If you’re curious about how to grow Monstera plants, proper fertilization is a crucial part of that process. It helps the plant establish a strong root system, which is essential when you are considering how to repot Monstera deliciosa or when to repot Monstera plant. Always ensure that the potting mix is well-draining to support healthy growth.
Fertilization is also vital if you want to try some Monstera plant hacks. A well-fed plant often produces larger leaves and more aerial roots, which can enhance the plant’s overall appearance in your home. So, grab that fertilizer and give your Monstera the boost it deserves!
Leave a Reply