Propagating roses from cuttings is easier than you might think! With just a few straightforward steps, you can enjoy the satisfaction of growing your own beautiful blooms right from home. This guide walks you through 17 simple steps to help you get those cuttings rooted and thriving in no time.
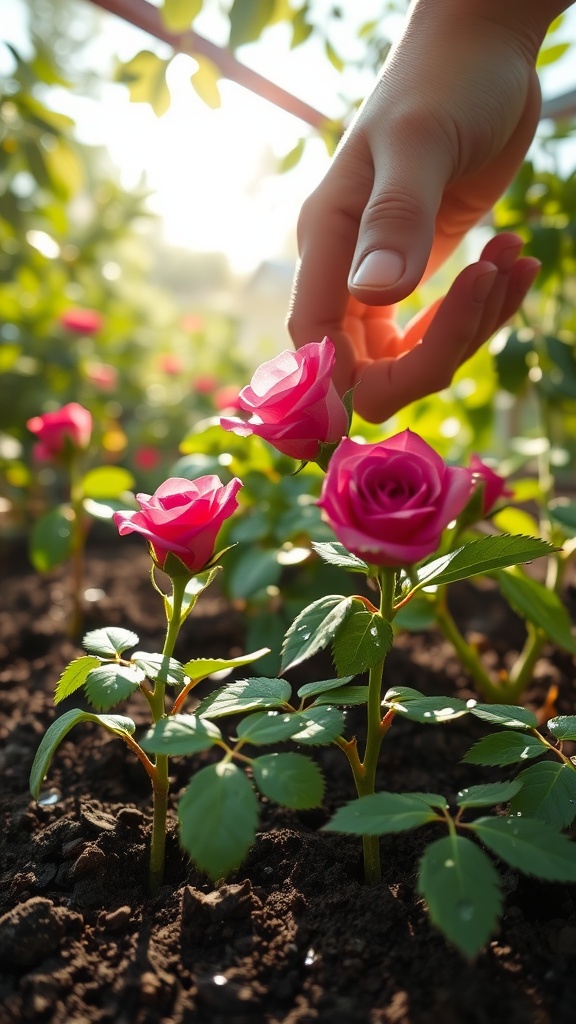
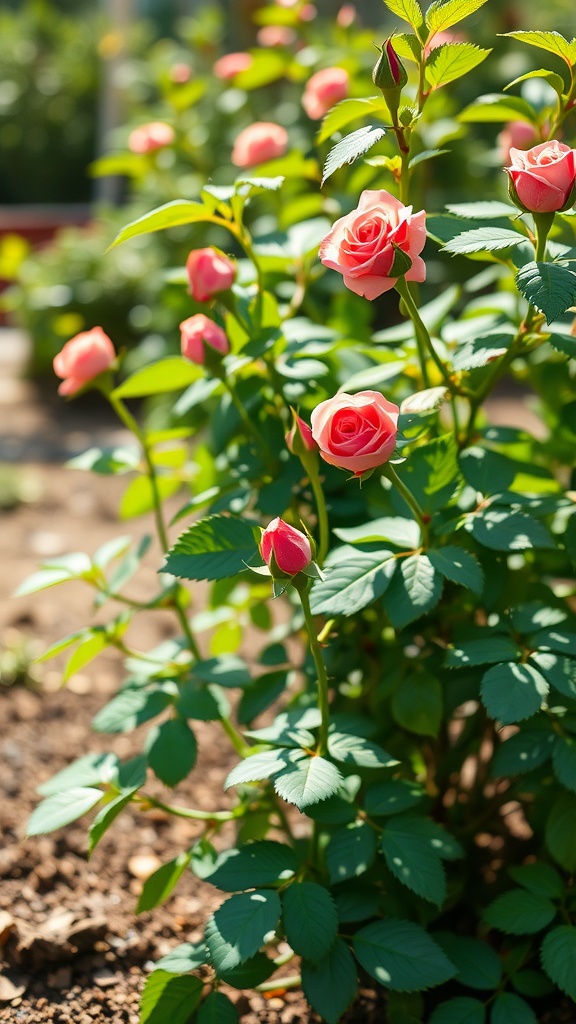
Select A Healthy, Disease-Free Stem (Avoid Flowering)
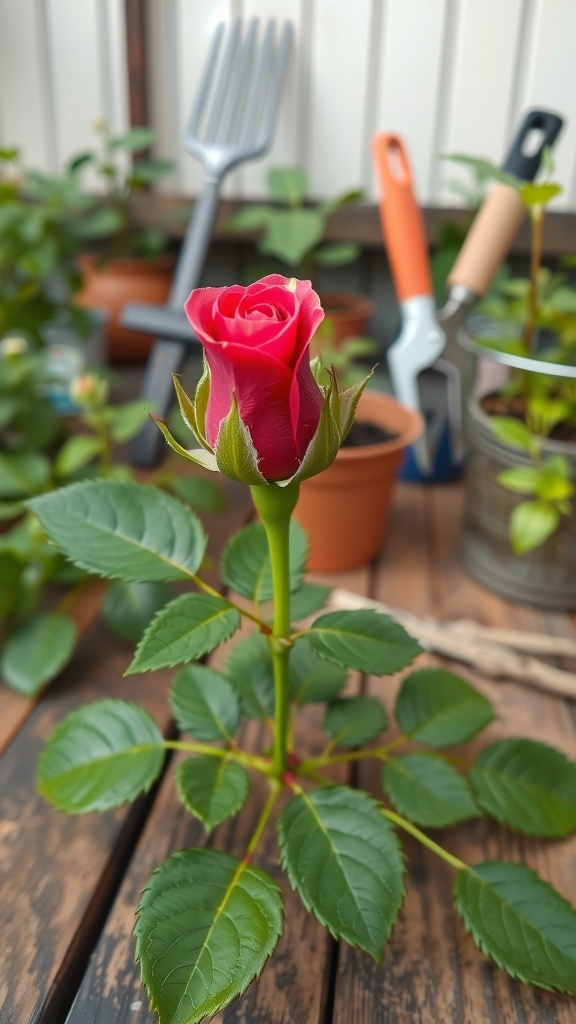
When propagating roses from cuttings, choosing the right stem is key. The image shows a vibrant, healthy rose with lush green leaves. This is the type of stem to look for!
When you’re selecting your cutting, aim for a stem that’s healthy and free from any signs of disease. You want to steer clear of flowering stems. Instead, look for those that are still in the growth phase. Flowering can drain energy from the cutting, making it less likely to take root.
Focusing on strong stems will help you in your rose propagation journey. If you’re starting roses from cuttings, you’ll want to be sure the stem has a good amount of leaves. The leaves help provide energy as the cutting establishes itself.
Consider pruned stems from your existing rose bushes. Pruning rose bushes not only encourages new growth but also gives you the perfect material for starting your mini rose garden. With the right approach, your cuttings will thrive!
Cut A 6-8 Inch Section Just Below A Leaf Node
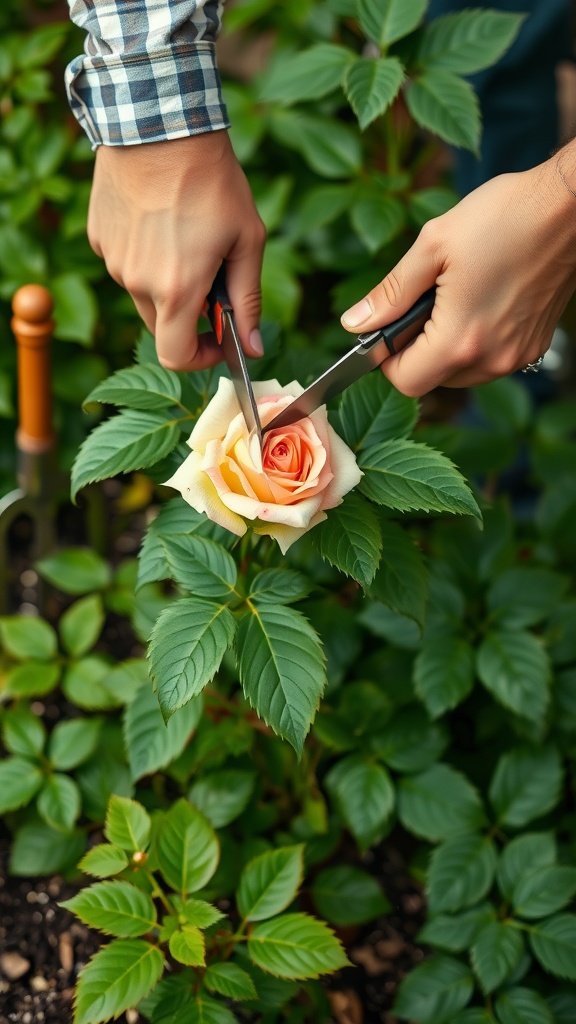
In the image, you can see someone carefully cutting a rose stem just below a leaf node. This is an important step in propagating roses from cuttings. Taking a section that is 6-8 inches long ensures you have enough stem to work with for successful growth.
The leaf node is where the leaves grow from the stem, and it’s crucial for root development. This area has the hormones needed for rooting, making it a perfect choice for starting roses from cuttings.
When you make the cut, use clean, sharp scissors or pruning shears. This helps prevent any damage to the plant and reduces the risk of disease. After cutting, you can place the stem in water or a potting mix to encourage root growth. This simple step can lead to a mini rose garden if done correctly!
Trim The Leaves And Remove Any Thorns From The Bottom

In this step, you need to focus on preparing your rose cuttings for propagation. The image shows hands working with fresh rose stems. Some beautiful pink and orange roses are nearby, which can really inspire your mini rose garden.
Start by trimming the leaves from the bottom few inches of each cutting. This helps the cutting focus its energy on root development instead of supporting excess foliage. You’ll want to leave a few leaves at the top, as they will help the plant gather sunlight later.
Next, take a moment to inspect your cuttings for any thorns. Carefully remove any thorns near the bottom of the stem. This makes handling the cuttings safer and more comfortable. Plus, it helps avoid damaging other plants in your garden when you’re planting your new roses.
Once you have your cuttings prepped, you’re one step closer to starting roses from cuttings. This meticulous attention to detail in pruning rose bushes will set a strong foundation for successful rose propagation!
Let The Cutting Dry For 2-4 Hours To Form A Callus

When you’re starting roses from cuttings, it’s important to let the cut ends dry out a bit. The image captures freshly cut roses resting on a table, with a timer showing 2:4. This is a perfect reminder that patience is key in rose propagation.
Allowing the cuttings to sit for 2-4 hours helps them form a callus. This process prevents rot when you eventually plant them. The callus acts as a protective barrier, giving your cuttings a better chance at thriving.
As you look at the lovely pink roses in the photo, think about how each petal holds the promise of new growth. After the drying period, you can prepare to plant your cuttings in a suitable medium. Whether you’re using soil or a propagation mix, make sure it’s well-draining.
This step is crucial in your rose food gardening journey. With the right care, you will soon see new roots forming. Just remember that rose propagation takes time, and keeping your cuttings in a proper environment is essential for success.
Dip The Cut End In Rooting Hormone For Better Root Development
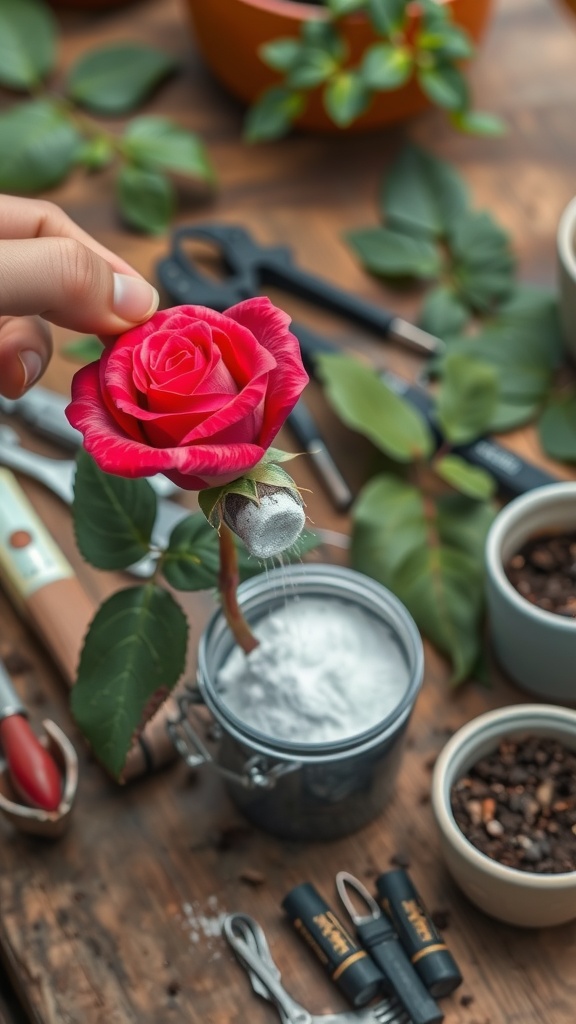
When you’re propagating roses from cuttings, using rooting hormone can make a big difference. In the image, you can see a fresh rose cutting being dipped into a container of rooting hormone. This simple step boosts the chance of healthy root growth.
Rooting hormone contains growth hormones that help stimulate root development. It gives your rose cutting that extra push needed to thrive. After taking a cutting from a healthy rose bush, it’s important to remove excess leaves and then dip the cut end into the powder. This prepares your cutting for planting.
Using rooting hormone isn’t just for show; it actually improves the success rate of starting roses from cuttings. Once you’ve dipped your cutting, you can plant it in soil mixed with some rose food gardening nutrients. This will provide the ideal environment for your new rose to grow.
If you’re thinking of creating a mini rose garden, don’t skip this step. Proper care at this stage sets the foundation for a beautiful display of blooms in the future. Remember, the goal is to encourage strong and healthy roots, and rooting hormone is the secret ingredient that helps you achieve that!
Prepare A Well-Draining Potting Mix (Blend Of Potting Soil And Perlite)
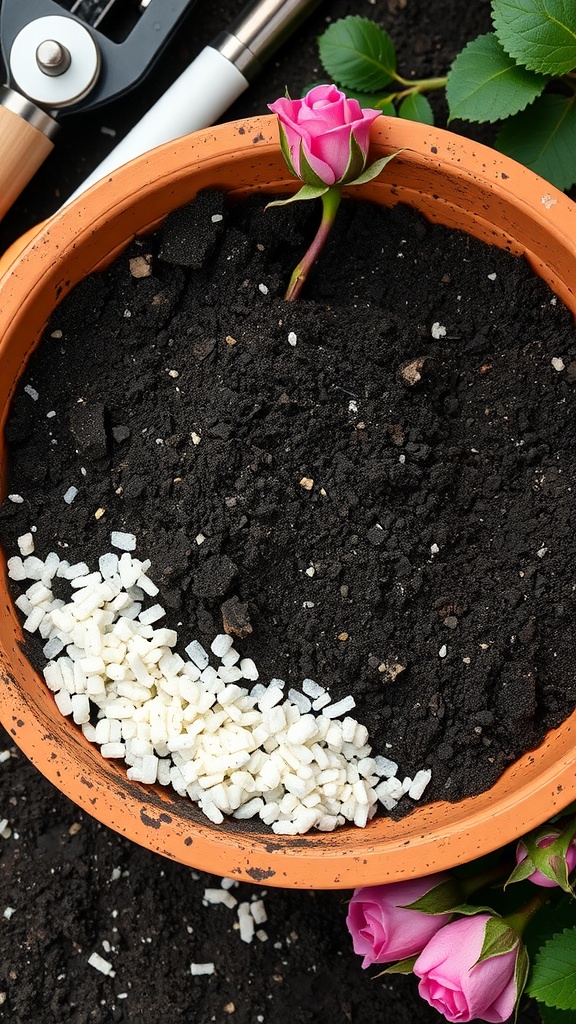
Creating a great potting mix is key when you want to propagate roses from cuttings. The image shows a terracotta pot filled with dark, rich potting soil, mixed with white perlite granules. This combination ensures that your new rose cuttings will have the right environment to thrive.
The dark soil provides nutrients while the perlite aids in drainage. This balance helps prevent root rot, a common issue when starting roses from cuttings. You want your potting mix to be light and airy, allowing the roots to breathe and grow strong.
Alongside the pot, you can spot a few delicate pink roses. These beauties are a reminder of what you’re working towards. With the right potting mix and care, you can grow your mini rose garden right at home. Always remember to check the moisture levels in the soil to keep your cuttings happy!
Plant The Cutting In The Soil, Ensuring The Node Is Below The Surface

In this step of rose propagation, it’s all about getting your cutting into the soil just right. The image shows a vibrant rose cutting, ready to take root. Ensure that the node, which is where the leaves sprout, is buried in the soil. This part is crucial for the plant to absorb nutrients and grow.
When you plant the cutting, make a hole deep enough to cover the node, but not so deep that the cutting is buried too low. This helps in starting roses from cuttings effectively. The fresh, green leaves above the surface will help the plant gather sunlight, while the node below will work its magic.
Don’t forget to water the soil gently after planting. This keeps the soil moist, which is key for the roots to develop. Proper watering promotes healthy growth in your mini rose garden. You’re laying the groundwork for beautiful blooms!
Water Lightly, Keeping The Soil Moist (Avoid Overwatering)
In the image, we see a hand gently touching vibrant pink roses, surrounded by healthy green leaves. This scene captures a nurturing moment and emphasizes the beauty of caring for plants. When propagating roses from cuttings, it’s essential to maintain the right moisture levels in the soil.
Watering lightly is key in rose propagation. Overwatering can lead to root rot, which is one of the biggest challenges when starting roses from cuttings. Keep the soil consistently moist but not soggy. A good rule of thumb is to allow the top inch of soil to dry out before adding more water.
Using a spray bottle can help you mist the soil gently, ensuring the cuttings get the moisture they need without drowning. As you tend to your mini rose garden, watch for signs that your cuttings are thriving. If the leaves look vibrant and the stems remain firm, you’re on the right track.
Remember, successful rose propagation requires patience. Keep an eye on the moisture levels, and soon you’ll see new growth. With time and care, your cuttings will develop into beautiful rose bushes, perfect for your garden.
Place The Cutting In A Warm Location With Indirect Sunlight

When you’re propagating roses from cuttings, finding the right spot is key. The image shows lovely pink roses in a clear vase on a sunlit windowsill. This is an ideal location for rose cuttings. The warmth from the sun helps them thrive, but too much direct sunlight can dry them out.
Make sure to position your cuttings where they can soak up some light without being scorched. A warm spot with indirect sunlight will keep them cozy while promoting healthy growth. This is important for anyone wanting to start roses from cuttings.
As you set up your mini rose garden, you’ll notice that the right environment helps with root development. Regularly check the cuttings to ensure they’re getting enough light without overheating. Remember, patience is key in rose propagation!
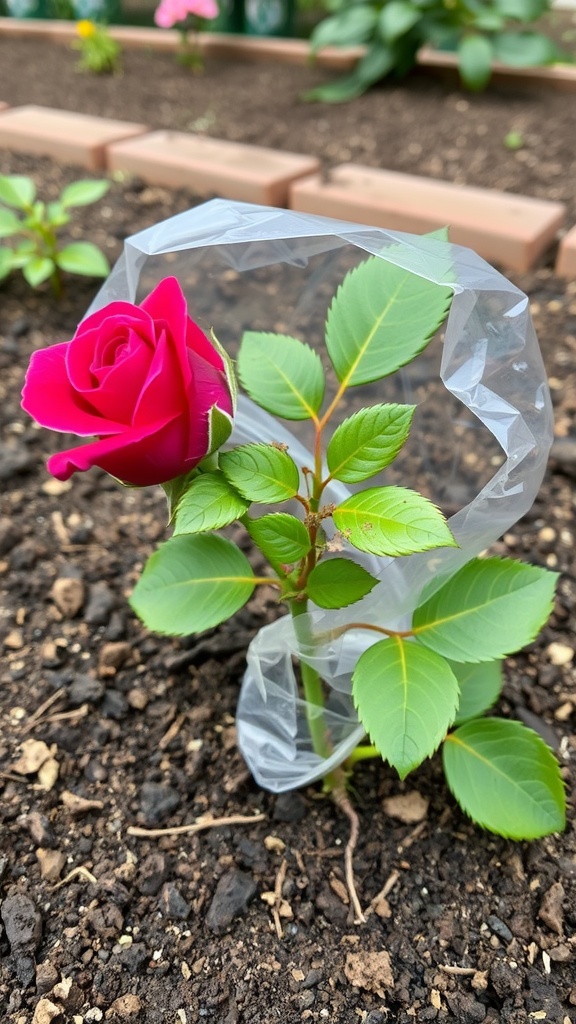
Cover With A Plastic Bag Or Dome To Create A Humid Environment
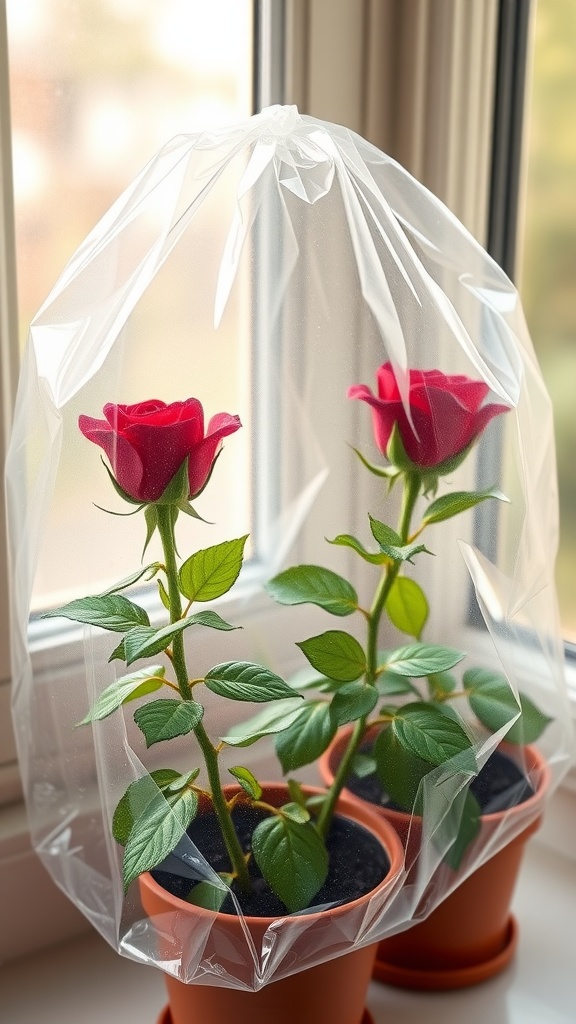
Creating a humid environment is key when you want to propagate roses from cuttings. The image shows two young rose plants covered with a clear plastic bag, which helps to trap moisture around the cuttings. This simple trick mimics a greenhouse effect, giving your new plants the best chance to thrive.
When starting roses from cuttings, it’s important to keep the soil moist but not soggy. The plastic bag or dome acts as a barrier, reducing evaporation and maintaining humidity. Make sure to check the cuttings regularly for signs of condensation. If it gets too wet, simply open the bag or dome for a bit to let some air circulate.
This step is crucial for rose propagation. If you’re planting rose bushes, remember that they love a humid atmosphere, especially when they’re just starting out. The plastic cover helps them adjust to their new environment and encourages healthy growth.
After a few weeks, you’ll start to notice new growth on your cuttings. This means they are developing roots and starting their journey as independent rose bushes. Keep up the good work, and soon enough, you’ll have a mini rose garden flourishing!
Mist Regularly To Maintain Humidity Without Excess Moisture
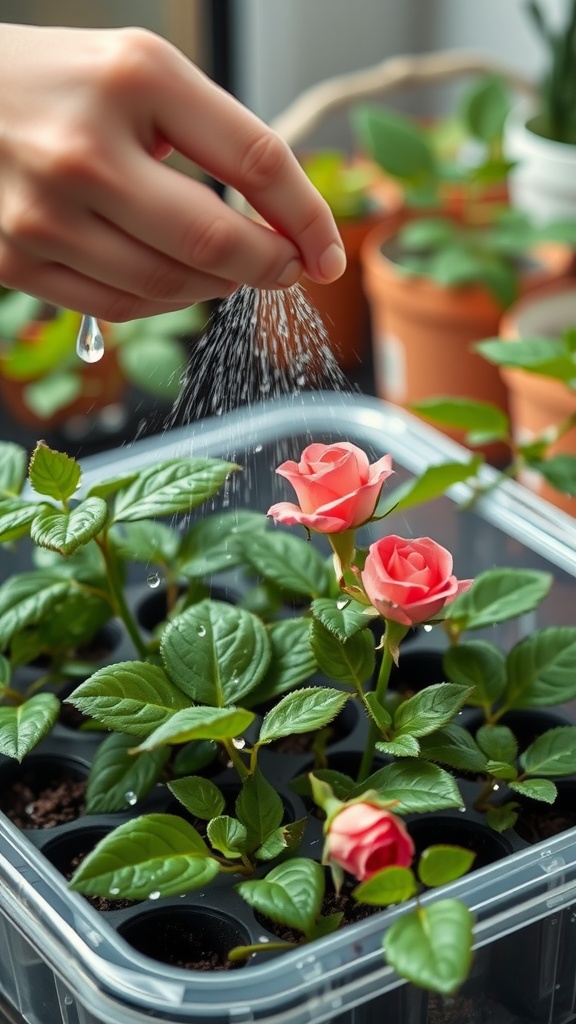
Misting is a simple yet effective way to keep your rose cuttings happy and healthy. In the image, you can see a hand gently spraying water over small rose plants. This technique is essential when you are propagating roses from cuttings.
The key here is to maintain humidity without creating a soggy environment. Overwatering can lead to mold or rot, which is not what you want for your budding plants.
Using a spray bottle, lightly mist the leaves and soil of your cuttings several times a day. This helps mimic the natural moisture they would receive in their environment. It’s a great way to support your mini rose garden without overwhelming the plants.
As you mist, keep an eye on the overall condition of your cuttings. Healthy leaves will be bright and vibrant. If they start to droop or turn yellow, it might mean they’re getting too much or too little moisture.
Remember, when you propagate roses, the goal is to create a nurturing space that fosters growth. By maintaining the right humidity levels, you’ll set your cuttings up for success as they develop strong roots.
Check For Root Development In 3-4 Weeks By Gently Tugging
After planting your cuttings, patience is key. In about 3-4 weeks, it’s time to check in on your new rose plants. This is an exciting moment in therose propagationprocess. Gently tug on the cuttings to see if they have developed a root system.
If you feel some resistance, congratulations! This means roots are forming, and your efforts topropagate roses from cuttingsare paying off. A firm grip on the base of the cutting can help without damaging the young plant.
On the flip side, if it feels loose, don’t worry. Sometimes, it just takes a bit longer. Make sure to keep the soil moist and provide enough sunlight. Keeping your cuttings in amini rose gardensetup can help create an ideal environment.
As you continue your journey withstarting roses from cuttings, remember that a little care goes a long way. Keeping up withrose food gardeningand ensuring proper support for your plants will encourage healthy growth.
Once Roots Are Established, Gradually Remove The Plastic Cover
After you’ve taken the right steps to propagate roses from cuttings, it’s time for an exciting moment: removing the plastic cover! This step is crucial. It helps your new rose cuttings adapt to their environment.
The image shows a vibrant pink rose, still nestled in the soil, with a protective plastic cover. This cover keeps the humidity high, which is essential while the roots are developing. It creates a mini greenhouse effect that helps the cuttings thrive.
Once you notice the roots are well-established, usually after a few weeks, you can start to gradually remove the plastic. This is like giving them a little taste of the outside world. Start by lifting the cover slightly, allowing fresh air to circulate. This process encourages the cuttings to strengthen and prepare for life outside their protective bubble.
As you continue with this gradual removal, pay attention to the plant. If it looks healthy and is growing, you’re on the right track. If it’s showing signs of stress, like wilting or yellowing, you may want to leave the cover on a bit longer.
Remember, starting roses from cuttings requires patience. The goal is to transition the plants safely into the larger environment, setting them up for a successful future. Soon, you’ll have a beautiful mini rose garden!
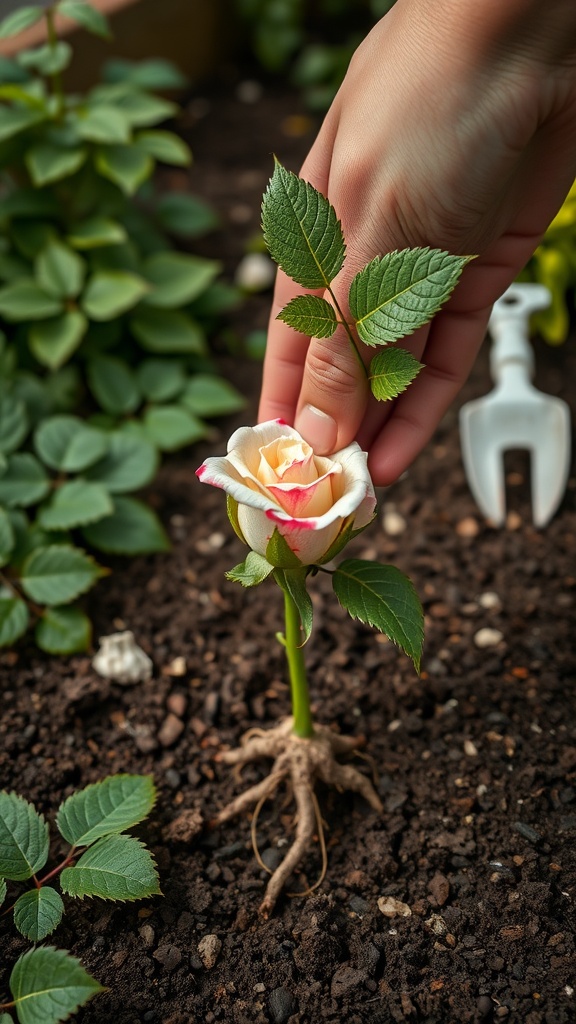
Transplant To A Larger Pot Or Into The Garden Once Roots Are Strong
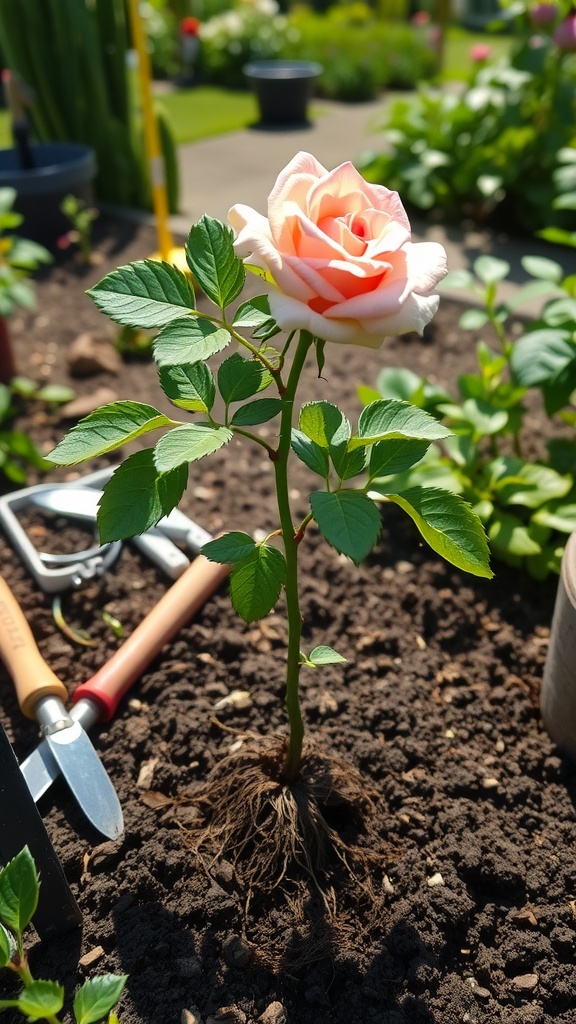
In the image, you can see a young rose cutting that has successfully established roots. This moment marks a significant step in propagating roses. The rose bush stands tall with vibrant green leaves, showing its readiness for the next phase of its growth journey.
Once you notice healthy roots, it’s time to think about transplanting. This could mean moving your rose cutting to a larger pot or planting it directly into your garden. Choose a spot with good sunlight, as roses thrive in bright conditions.
When planting rose bushes, ensure the soil is well-drained and rich in nutrients. This will help your new rose flourish. Mixing in some rose food gardening products can give your plant a boost, promoting strong growth.
Using some support ideas can also be helpful as your rose continues to grow. This might be simple stakes or even a charming trellis. Remember, the goal is to create an environment where your rose can thrive. With a bit of care and attention, your cutting can become a beautiful part of your garden.
Harden Off The Cutting By Slowly Introducing It To More Sunlight
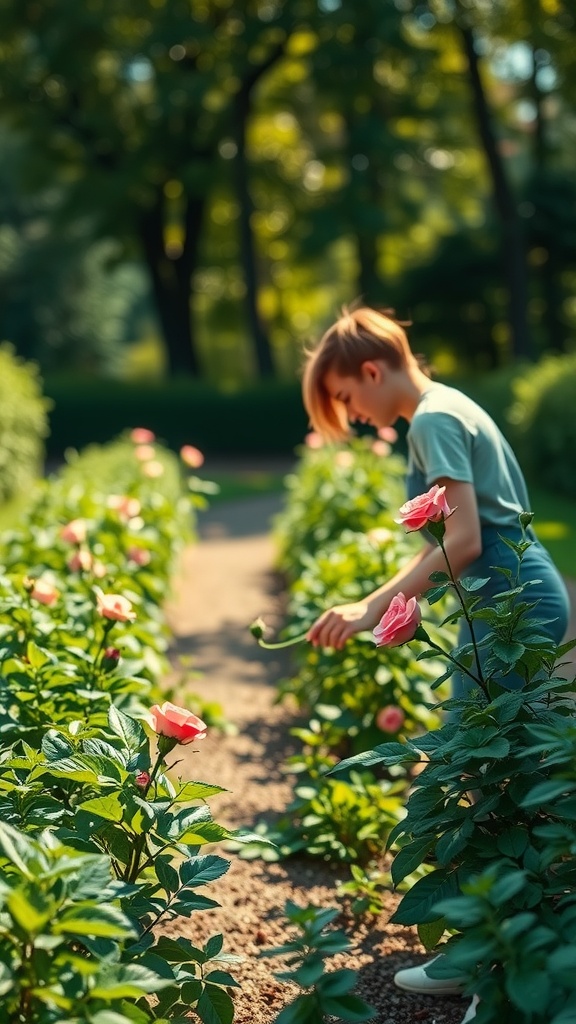
When you’re starting roses from cuttings, one of the key steps is to harden off your cuttings. This process helps them adapt to their new environment. In the image, you can see a person carefully tending to a row of beautiful rose bushes. The soft sunlight filtering through the leaves creates a serene atmosphere, perfect for nurturing these delicate plants.
To harden off your cutting, start by placing it in indirect sunlight for a few hours each day. Gradually increase the exposure to direct sunlight over a week or two. This transition helps the plant adjust without getting scorched. Just like in a mini rose garden, patience is key to successful rose propagation.
As your cuttings become sturdier, they’ll be better equipped to thrive as you move on to planting rose bushes in your garden. Remember, rose food gardening practices can boost their growth and health. Take your time during this step, and your roses will thank you later!
Water Regularly, Allowing Soil To Dry Between Waterings
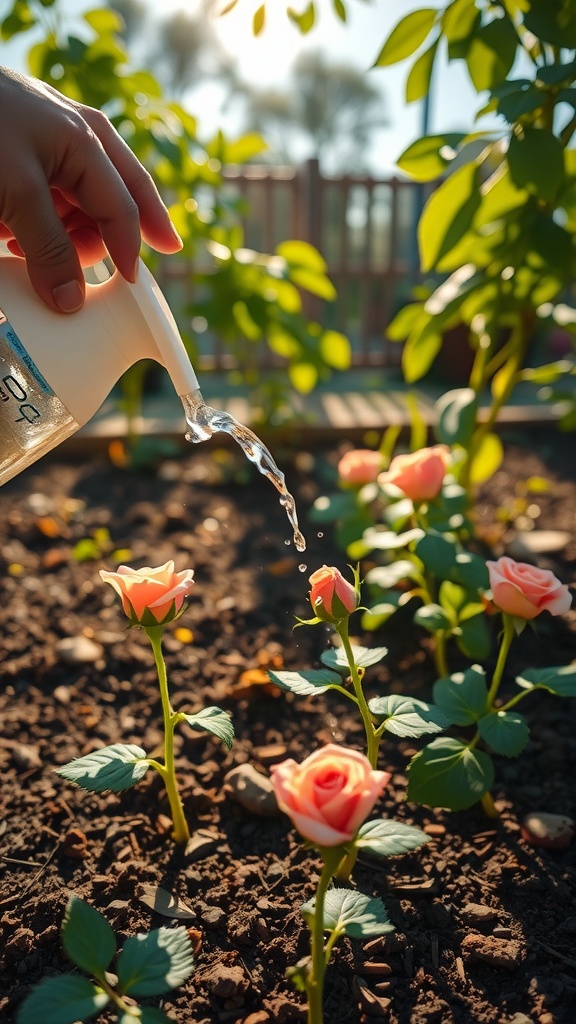
Watering is essential in the process of propagating roses from cuttings. In the image, you see a hand watering freshly planted roses. This simple act supports their growth and helps them establish roots.
When starting roses from cuttings, it’s important to find a balance. You want to keep the soil moist but not soggy. Overwatering can lead to rot, while too little water can stunt growth. Aim for a routine that allows the soil to dry out slightly between waterings.
Creating a mini rose garden can be rewarding, and proper watering techniques are key. Monitor the moisture level closely. When the top inch of soil feels dry, it’s time to water again. This encourages the roots to grow deeper, which strengthens the plants.
Incorporating rose food gardening techniques can also aid in healthy growth. Adding nutrients during watering can give your cuttings the boost they need. Pay attention to your roses, and they’ll reward you with beautiful blooms.
Fertilize Lightly In Spring And Summer To Encourage Growth
As you look at the vibrant pink roses in the image, you can see the beauty that comes with proper care. These flowers thrive when given the right nutrients, especially in spring and summer. This is the prime time for growth, and fertilizing lightly can make a big difference.
Using rose food gardening products will help keep your plants healthy. It’s essential to choose a balanced fertilizer that promotes blooming and strong root development. Just remember, a little goes a long way! Over-fertilizing can harm your beloved rose bushes.
When you’re starting roses from cuttings, consistent care during these months encourages them to grow healthy and strong. Keeping your rose bush support ideas in mind, make sure your plants have enough room to flourish. A mini rose garden can quickly turn into a colorful paradise with the right approach.
So, as you watch these roses bloom, think about how you can care for your own plants. Pruning rose bushes and providing proper nutrients are key steps in propagating roses successfully. With a bit of attention and love, your cuttings can grow into stunning plants just like the ones in the image.
Leave a Reply